Canting Digital

A web-based drawing application that emulates the key stages of traditional batik-making, including: sketching, applying wax, dyeing, and boiling to reveal a wax-resist effect.

Project Context

Master's Project
July - Sept 2026
Keio Media Design

My Role

UI/UX Design
Wireframing
Visuals
Programming

Deliverables

User Interface
Interactive Prototype

Tools Used

Figma
HTML/CSS/JS
p5.js
Visual Studio Code

Background

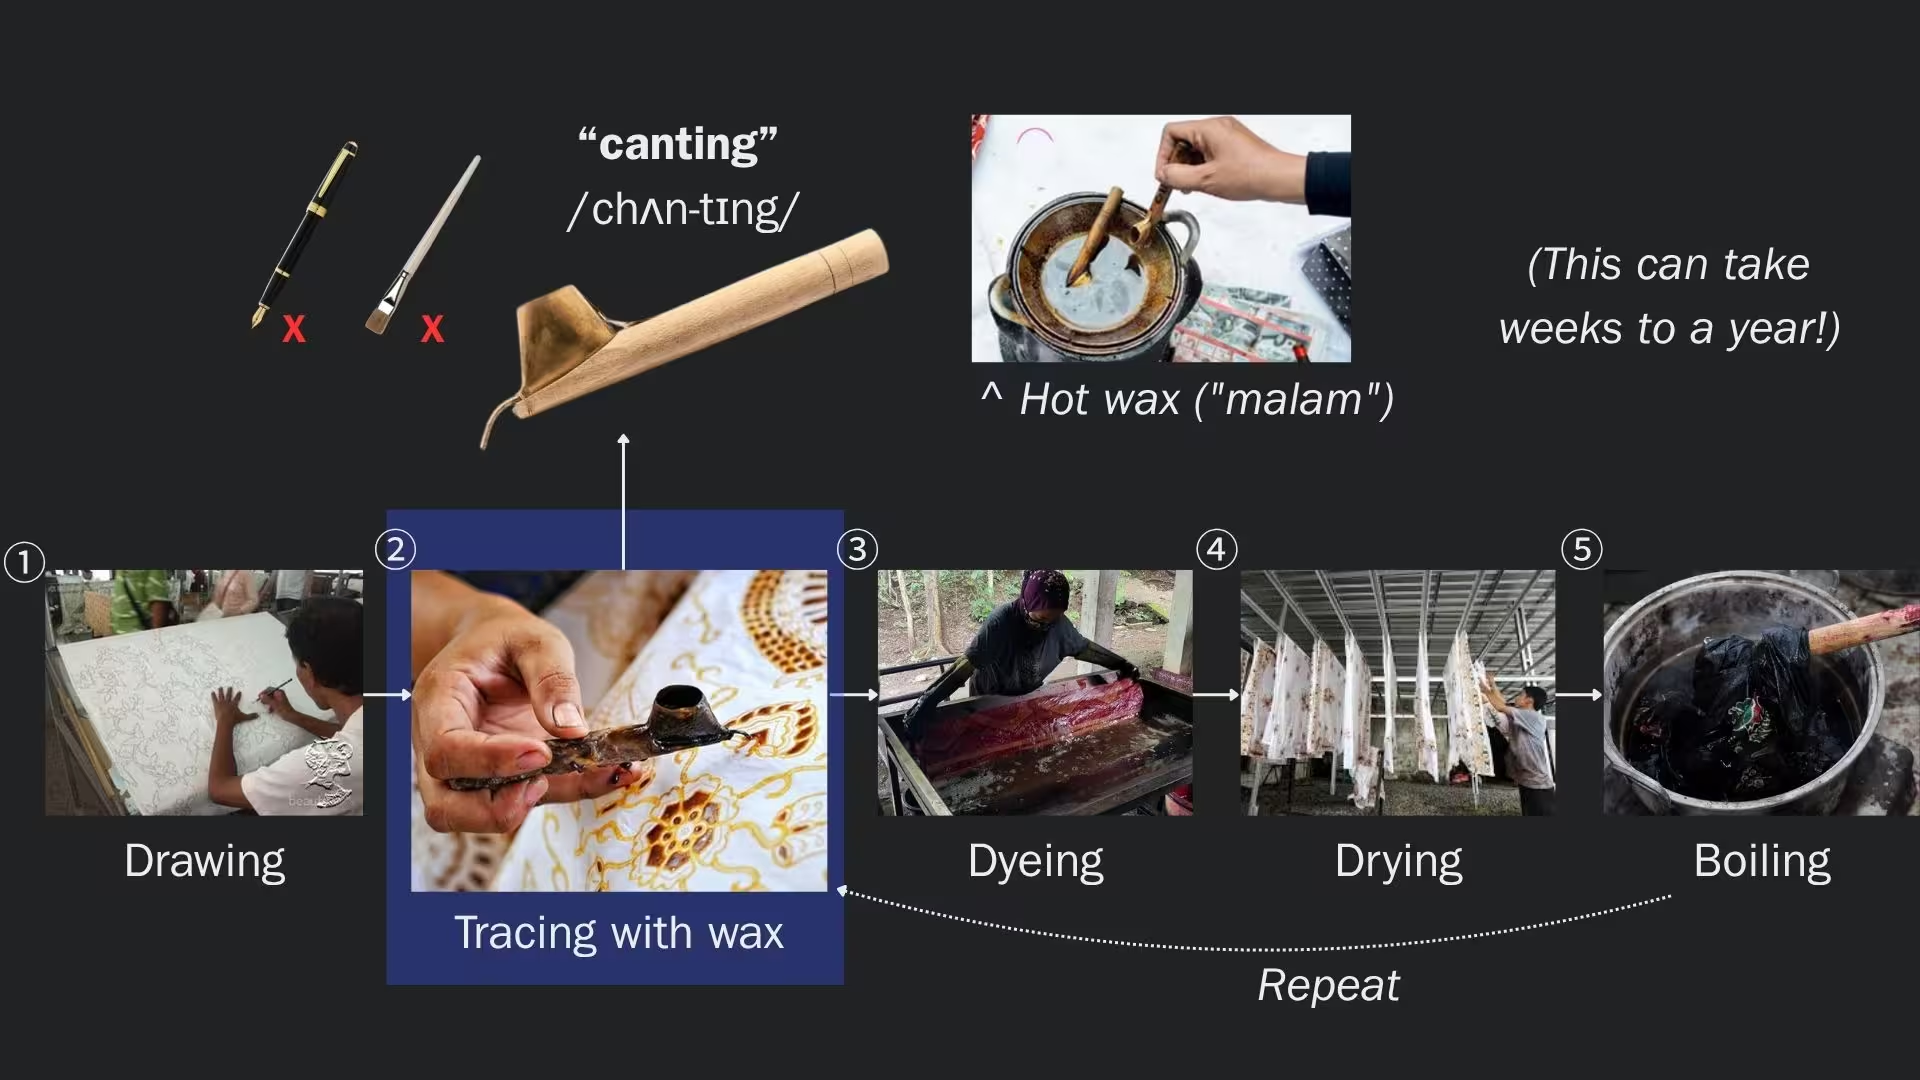
Recognized by UNESCO as an intangible cultural heritage in 2009, Indonesian Batik is a traditional textile known for its distinct and intricate patterns formed through a unique wax-resist dyeing technique. It is worn by many Indonesians on both everyday and formal occasions. Traditional batik-making involves the use of specialized tools and materials, such as the canting tool which is used to draw liquid malam wax and is poured onto fabric, with the wax serving as a barrier from dye during the coloring stage, and is washed away in boiling water, leading to the aforementioned wax-resist effect.

However, with how industrialized Batik is, an individual who is interested in trying and making their own batik might encounter difficulties when entering the craft. For one, access to the canting and malam wax is difficult for those who are outside of Java Island, especially more so when abroad in Indonesia. Moreover, a hobbyist might lack the facilities to handle important steps like dyeing, boiling, and drying, when compared to a batik factory. These factors represent physical barriers and might intimidate beginners from trying Batik.

Lastly, the wax needs to be boiling hot to be poured onto cloth, and so many beginners may mishandle the canting and accidentally drop wax onto themselves and scald their hands or make a mess around them. It is a quintessential childhood experience that many of us Indonesians had in school when we had to learn batik!

Ideation

As a designer, I thought: what if batik-making could be turned into a digital experience, so that any beginner could try making batik even without having the tools and facilities required? Specifically, I want to simulate all key stages of the batik-making process: sketching with a pencil on a canvas that serves as "cloth", tracing that sketch with wax from a "digital" canting, dyeing, and then boiling that cloth.

Initial VR Exploration

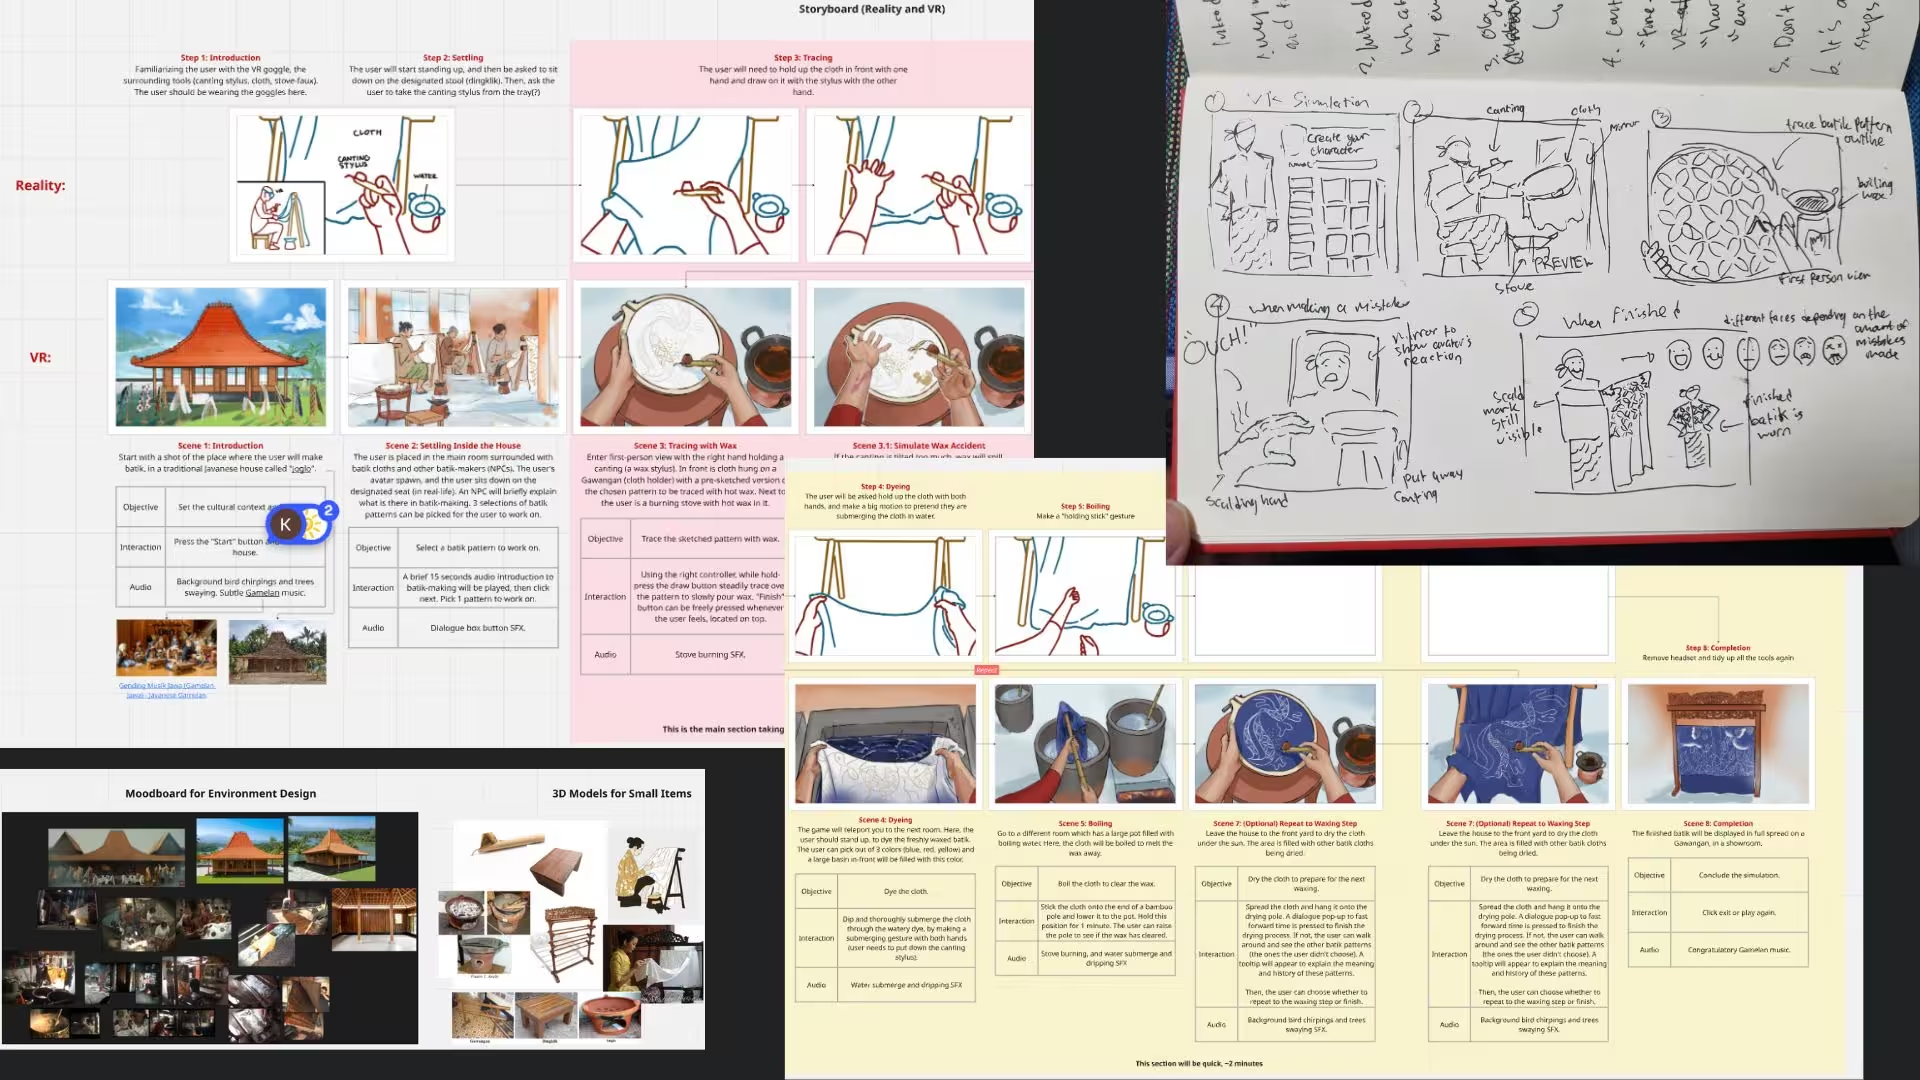
Initially, I started by exploring VR and how it can be used to make a sort of batik VR game. I initially made wireframes and illustrated user flows for my VR designer to see and translate into VR.
However, after thorough consideration and discussion with my peers and mentor at my lab, wearing a VR headset could potentially tire the user after 10 minutes and distract from the actual drawing experience. Thus, I decided to pivot to a digital application.

Transition to Digital Drawing Application

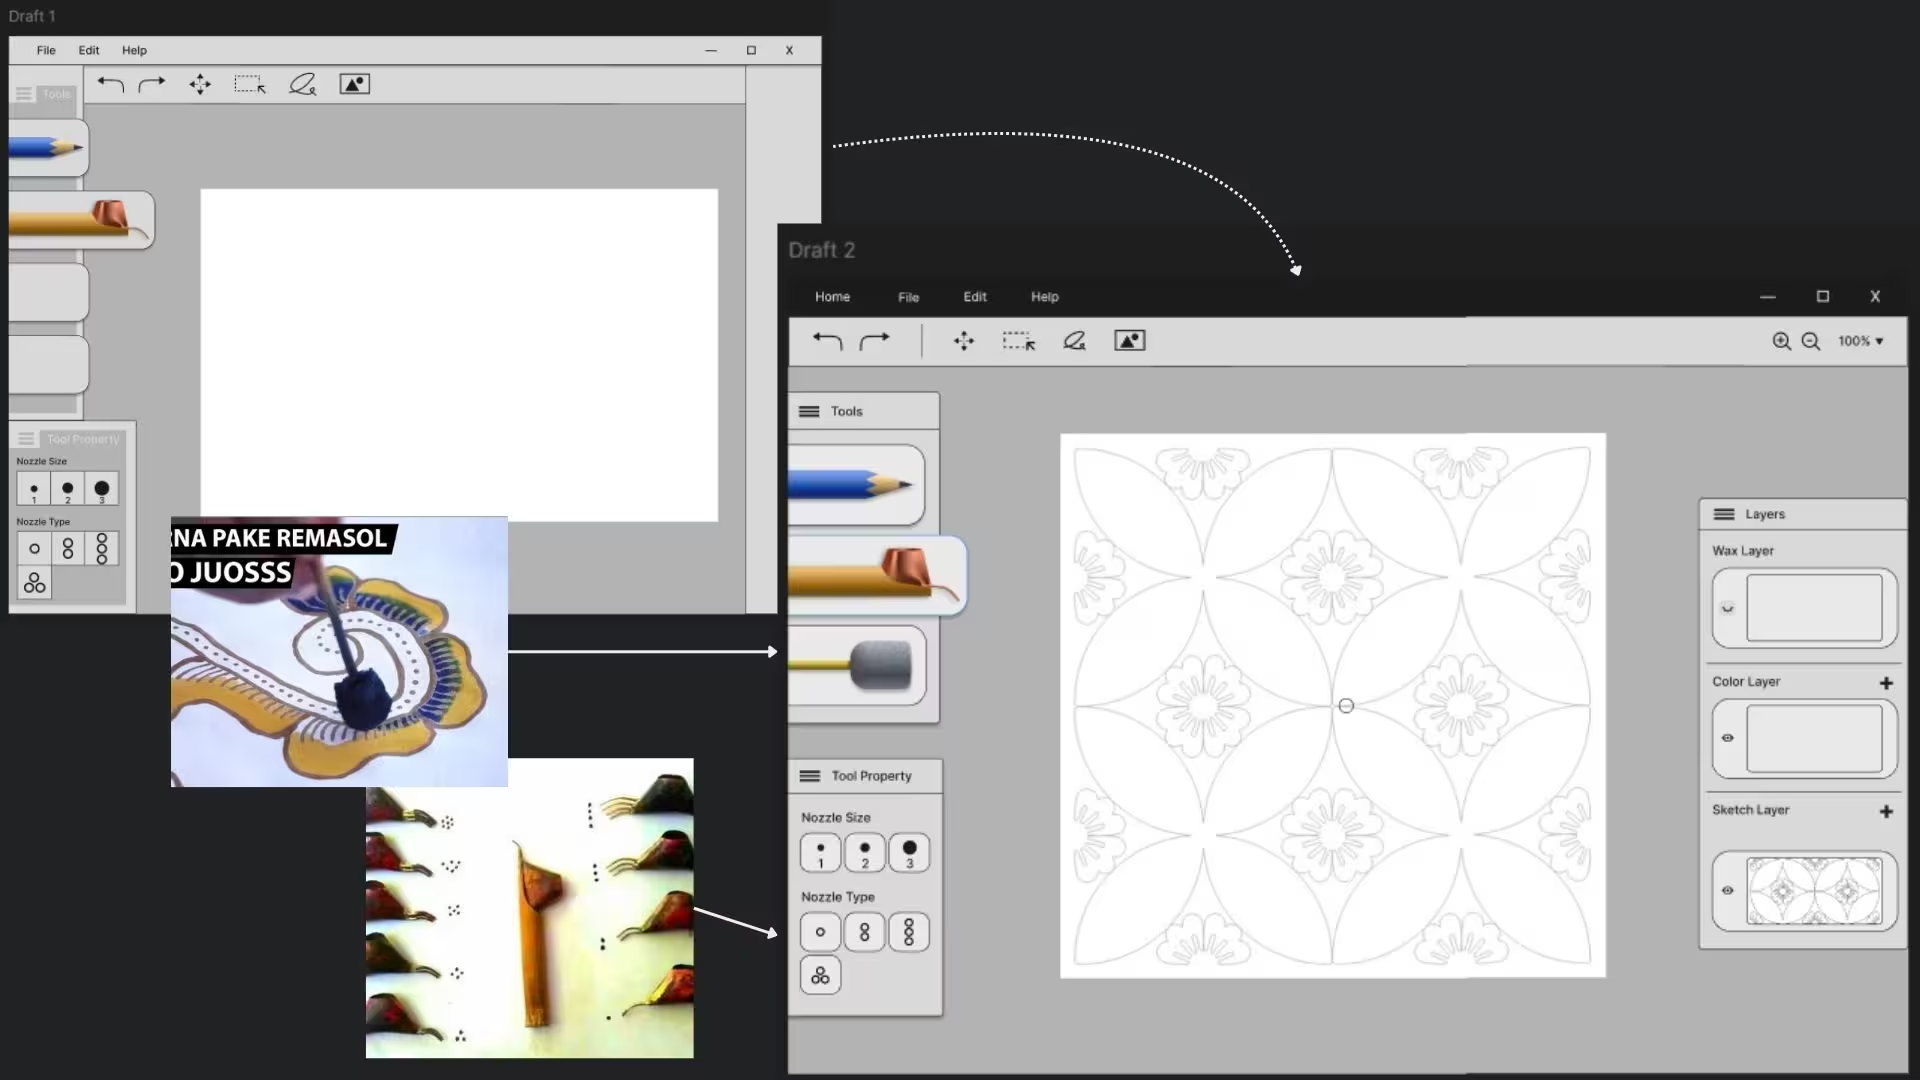
My now-refined goal with this project was to make a drawing application for desktop (+ pen tablet) and for tablet users. Drawing from my own and my friends' experience as a digital artist using different digital art applications such as Clip Studio Paint, Adobe Photoshop, and Procreate on the iPad, I created a wireframe of what the UI for this application could look like.
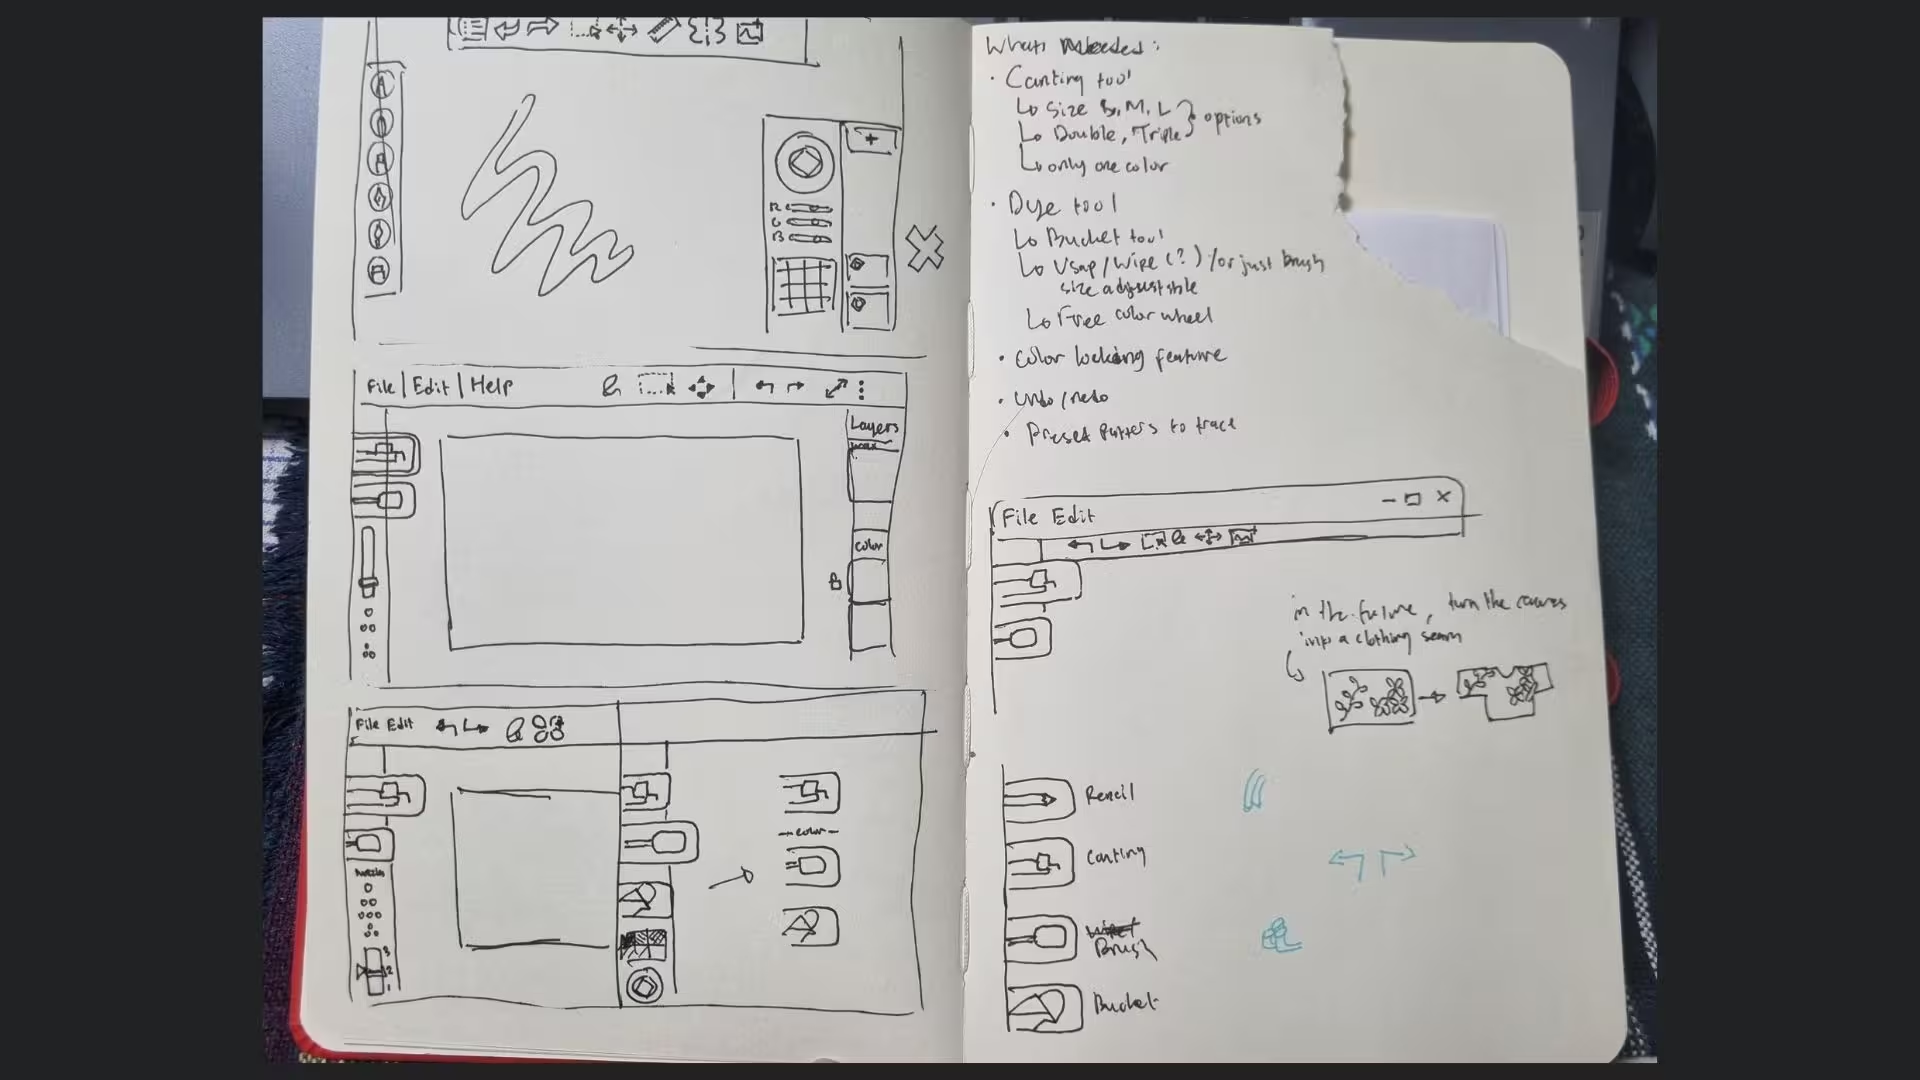
Here, I made sketches by following examples from other drawing UIs and emulating certain elements. At the time, I was inspired by how Figma designed their toolbar, and so I wanted to make them prominent in my application. I limited it to just 4 tools: a pencil, canting, brush (or, as I called it, a "paint dabber"), and initially a bucket tool. Compared to other programs that have a plethora of tools available, allowing users to simulate different types of paint like oil paint and watercolor, I want my program to be laser-focused on just creating traditional batik with wax.

I also had other features I wanted to include, such as a lasso/select tool, move tool, zoom in/out, and especially the undo/redo button. All of these had to be scrapped on the final prototype due to time constraints, but the undo/redo feature specifically was deliberately removed, which I will explain the reason why later.
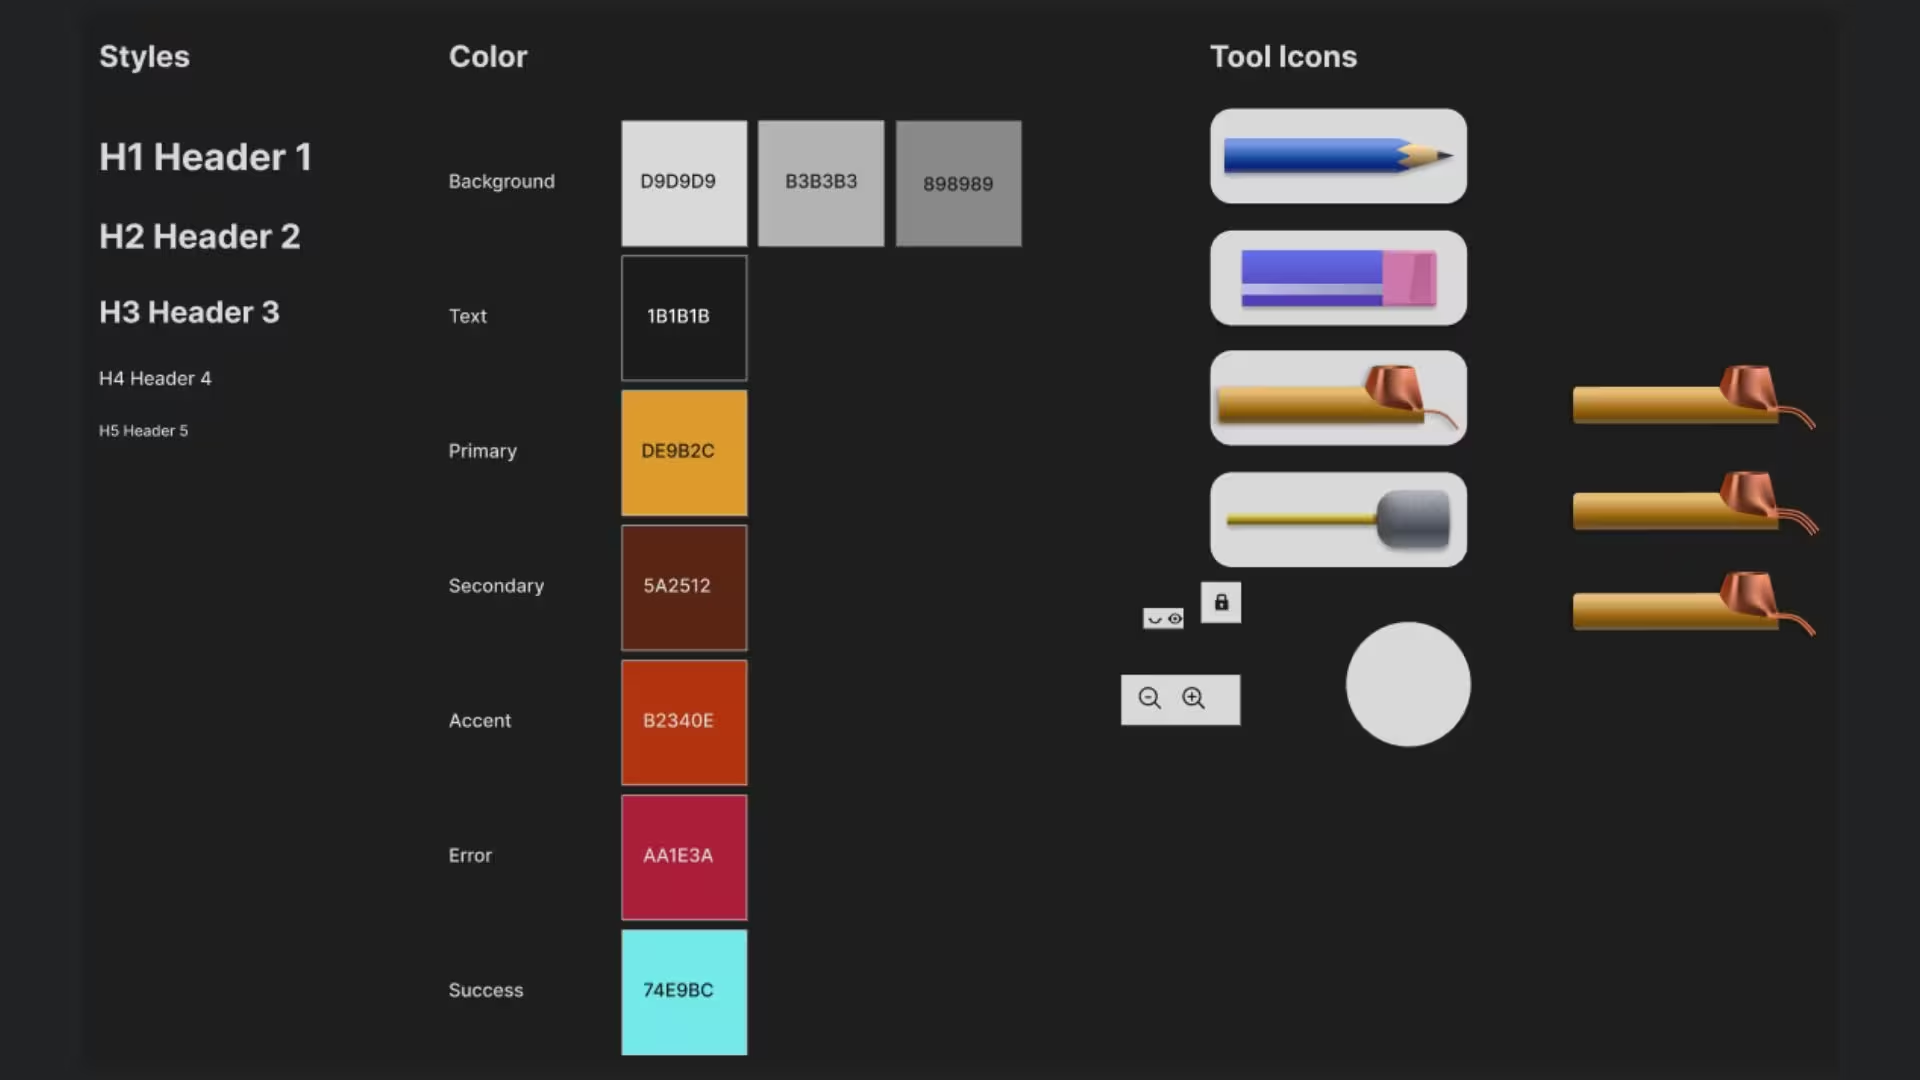
I moved over to Figma to translate my sketches into a mockup. I started with a "Styles" page to predetermine the color palette and font sizes. I also made vector art of the tools there. The tool property for the canting tool has an option to change the nozzle types, e.g. to double or triple nozzles, so the tool icon also has different versions to reflect how many nozzles there are. On the right side, the user is able to add layers for each of the three different layer types: wax, color, and sketch layers.

Implementation

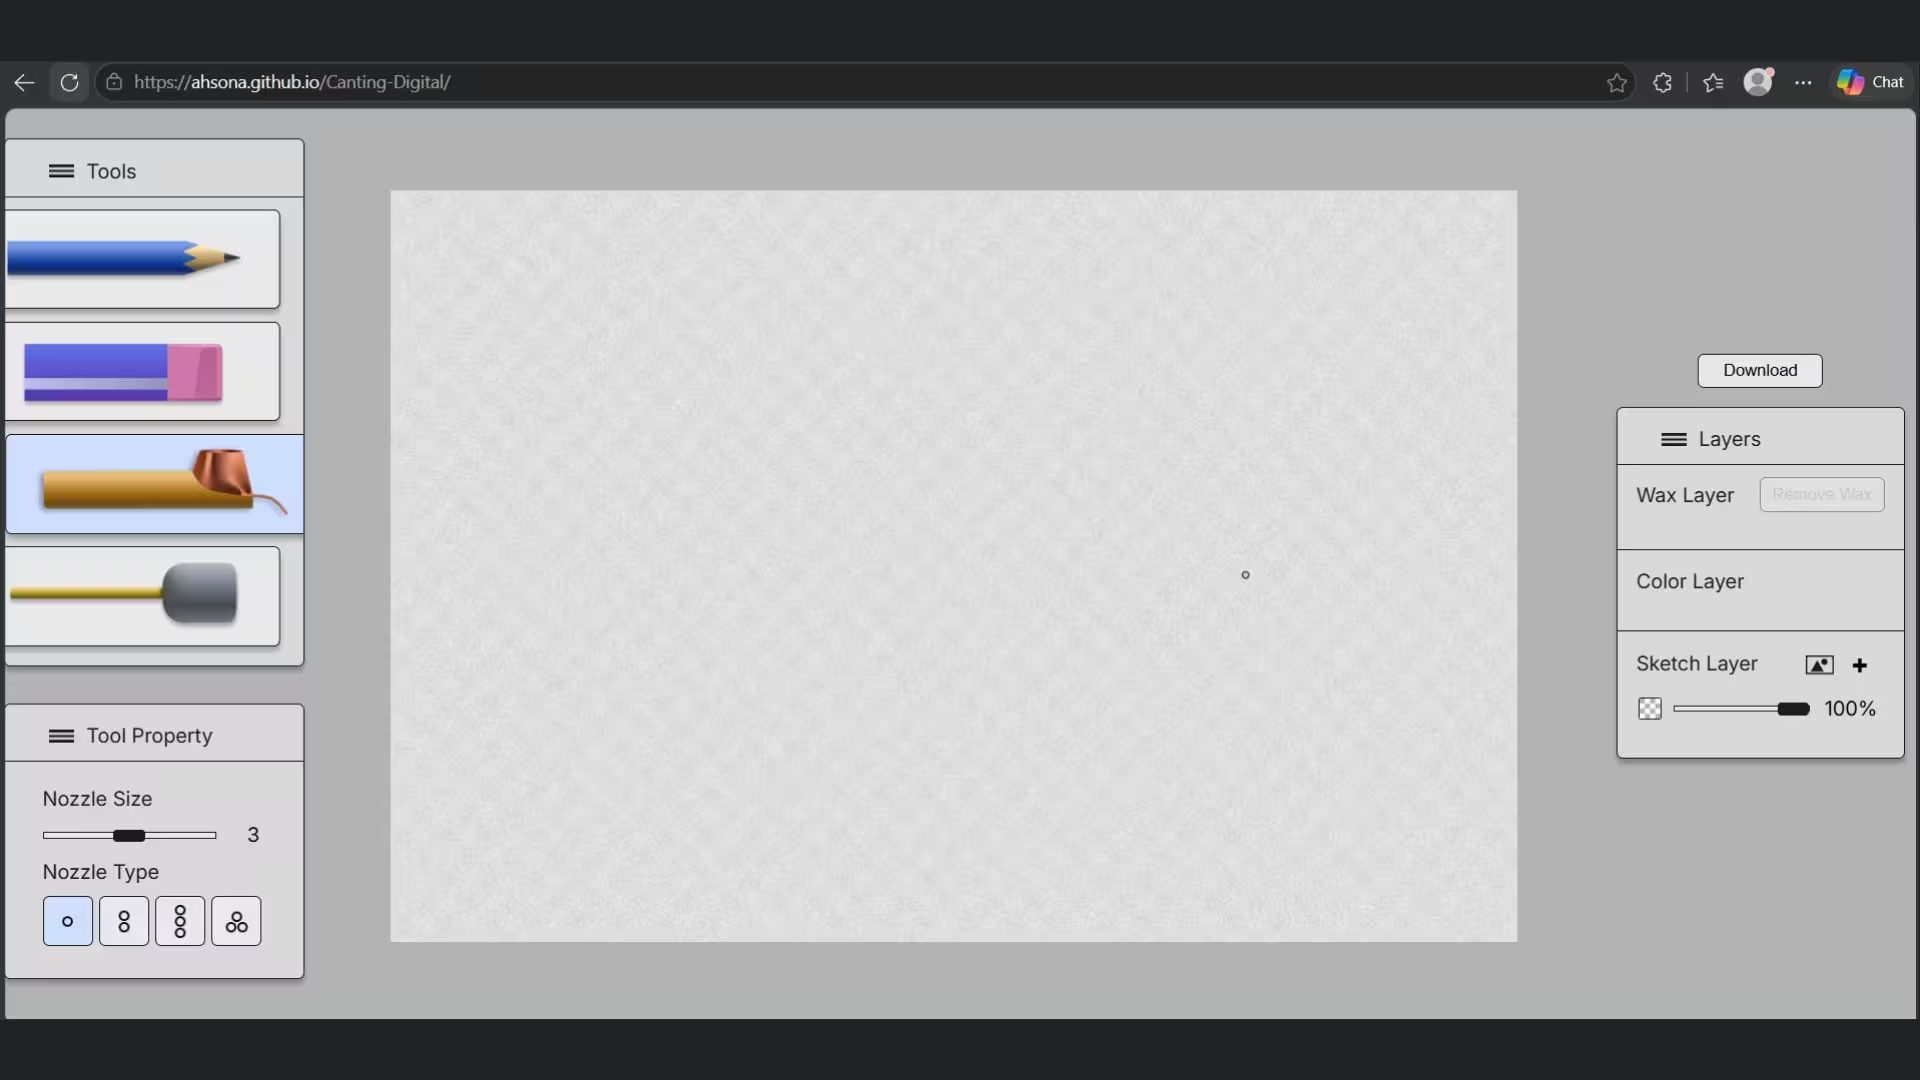
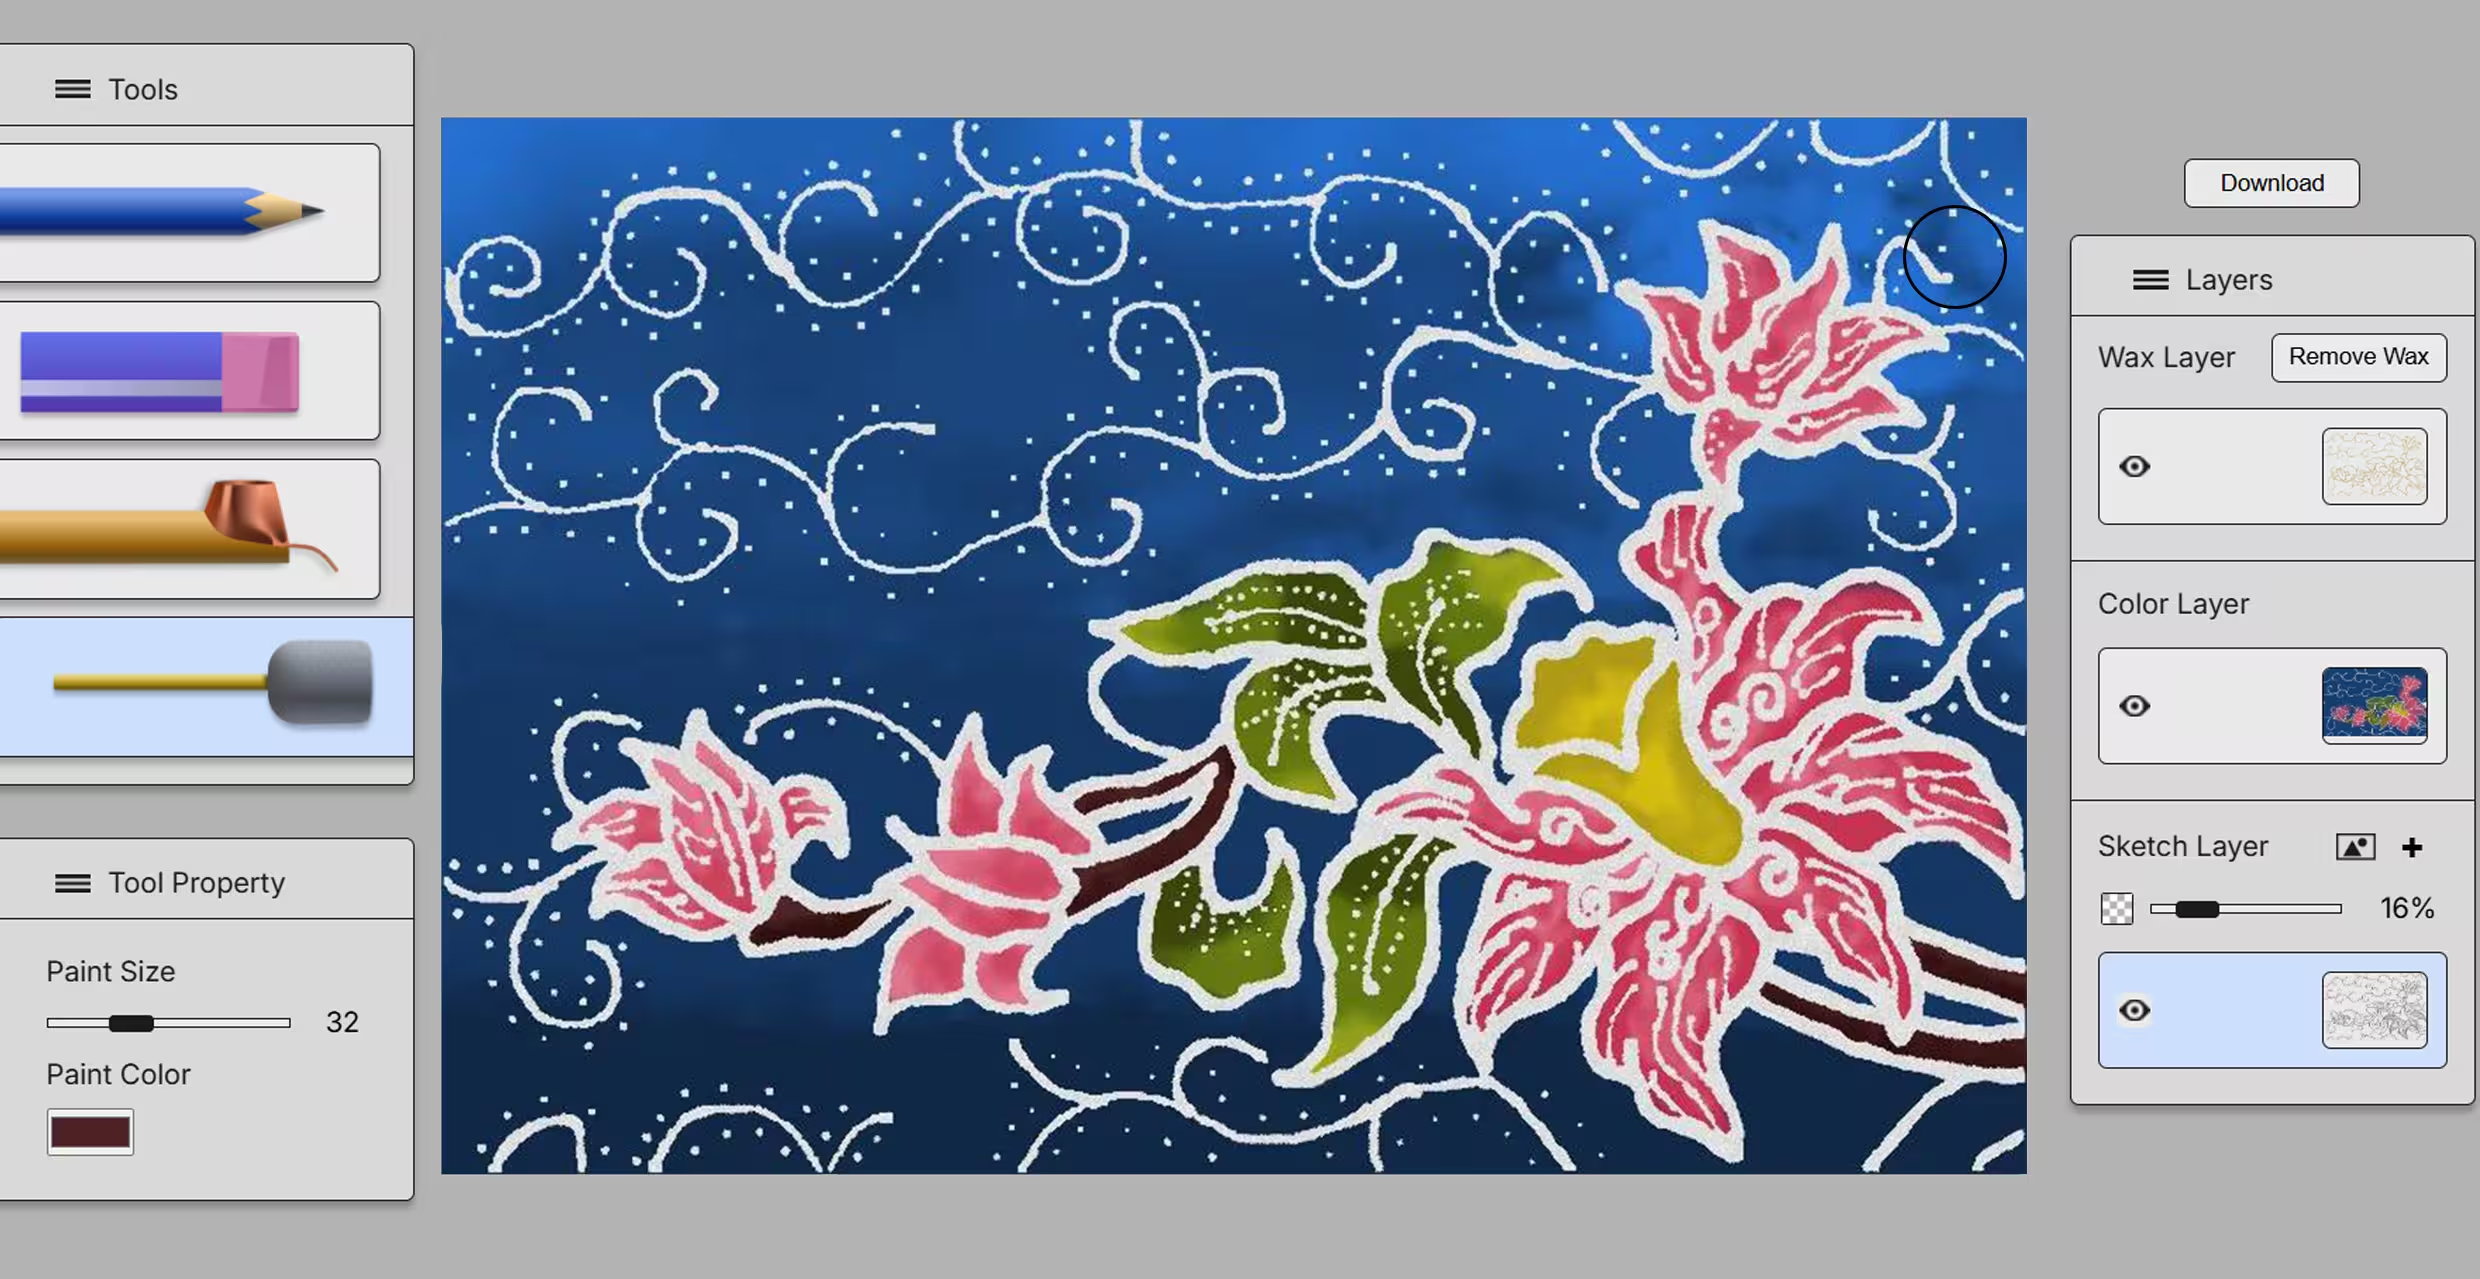
After the mockup on Figma is finished, I then moved over to Visual Studio Code to make the interface into a working, usable prototype. It is available here to try (note that it is meant for desktops and tablet ion landscape, not for mobile phones!).
Different from the mockup, instead of a paint bucket tool, I replaced it with an eraser tool that users can use to fix their sketches (which I realized was a strange lack of an eraser tool midway through making the program). However, this tool cannot be used to erase strokes made out of wax and paint. This is to be in line with the lack of an undo/redo button, as it is meant to simulate the permanence of wax and color when it is put on cloth. Thus, the idea is to create an environment where the user has to plan out and think thoroughly about when and where to apply wax.

User-flow

Below is the flow of using the program, following the order of traditional batik-making:

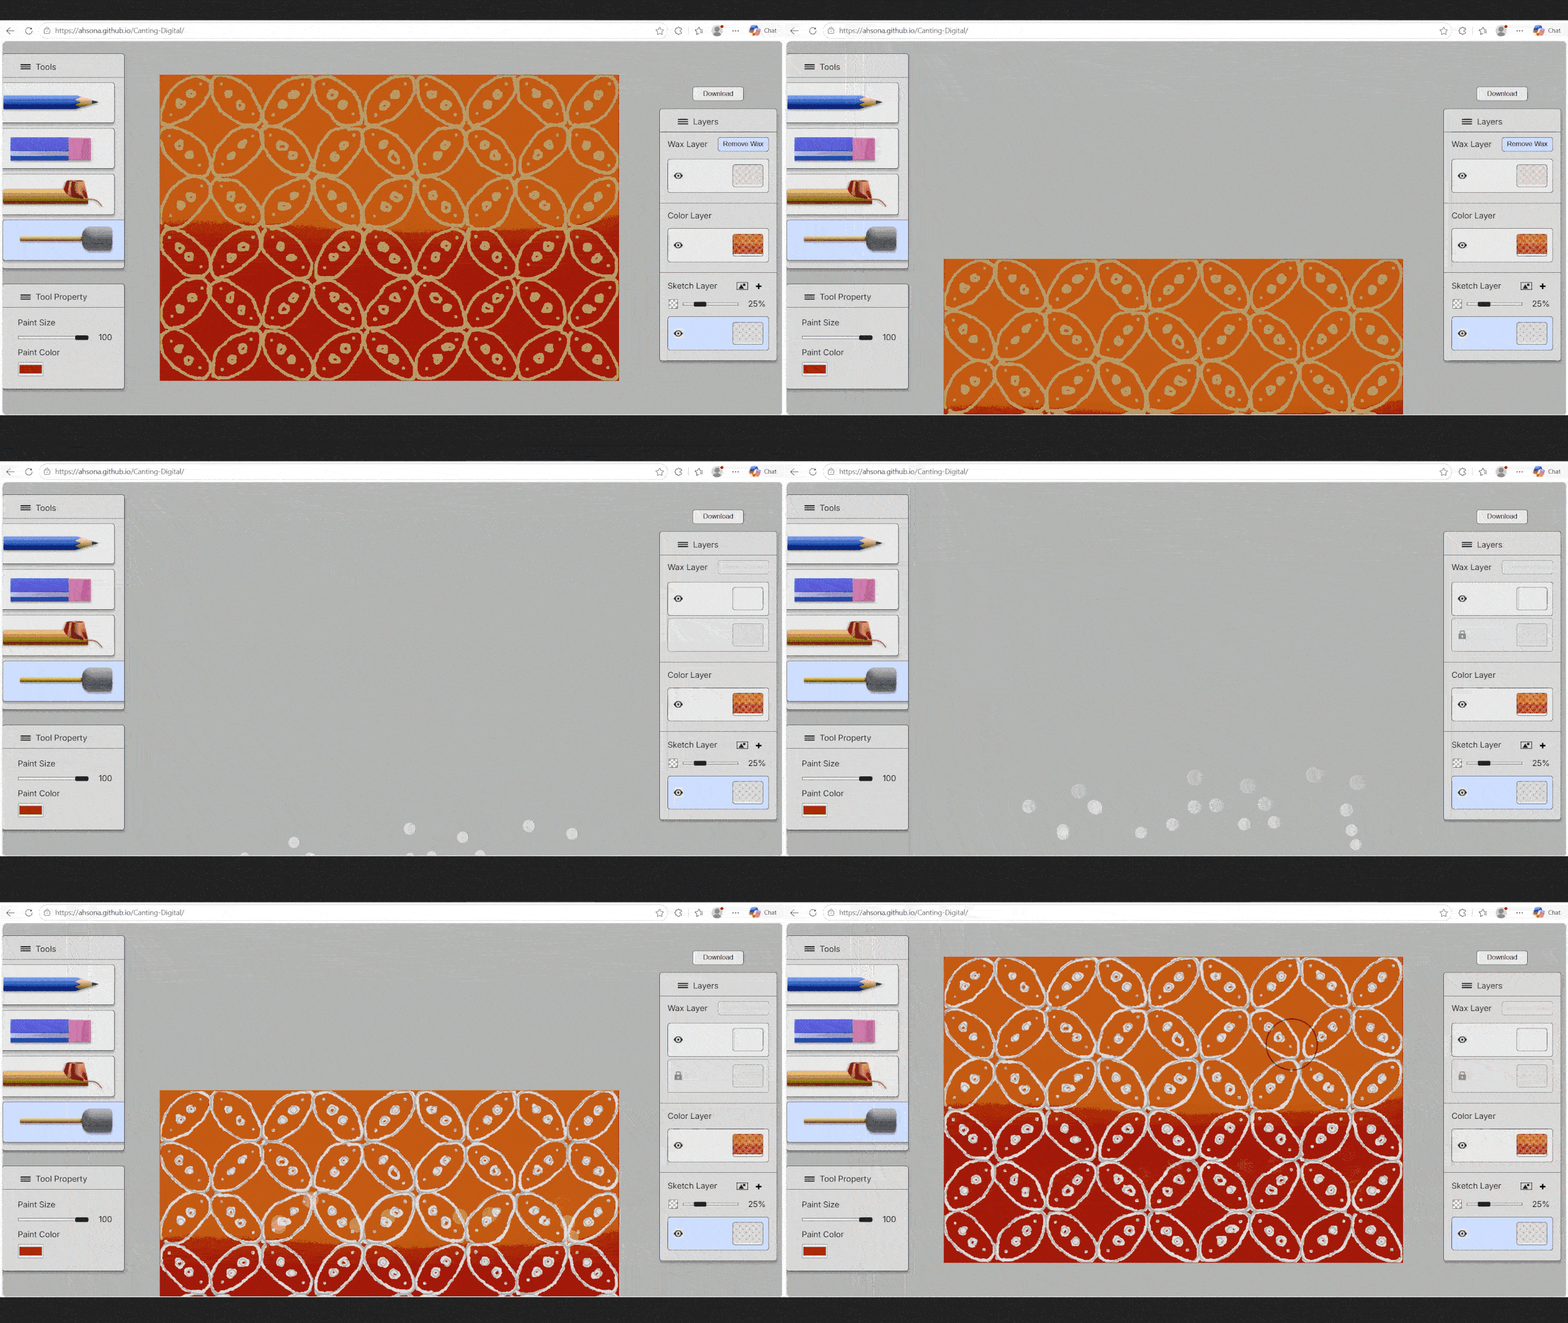
1. Draw a Sketch / Insert a Preset Pattern

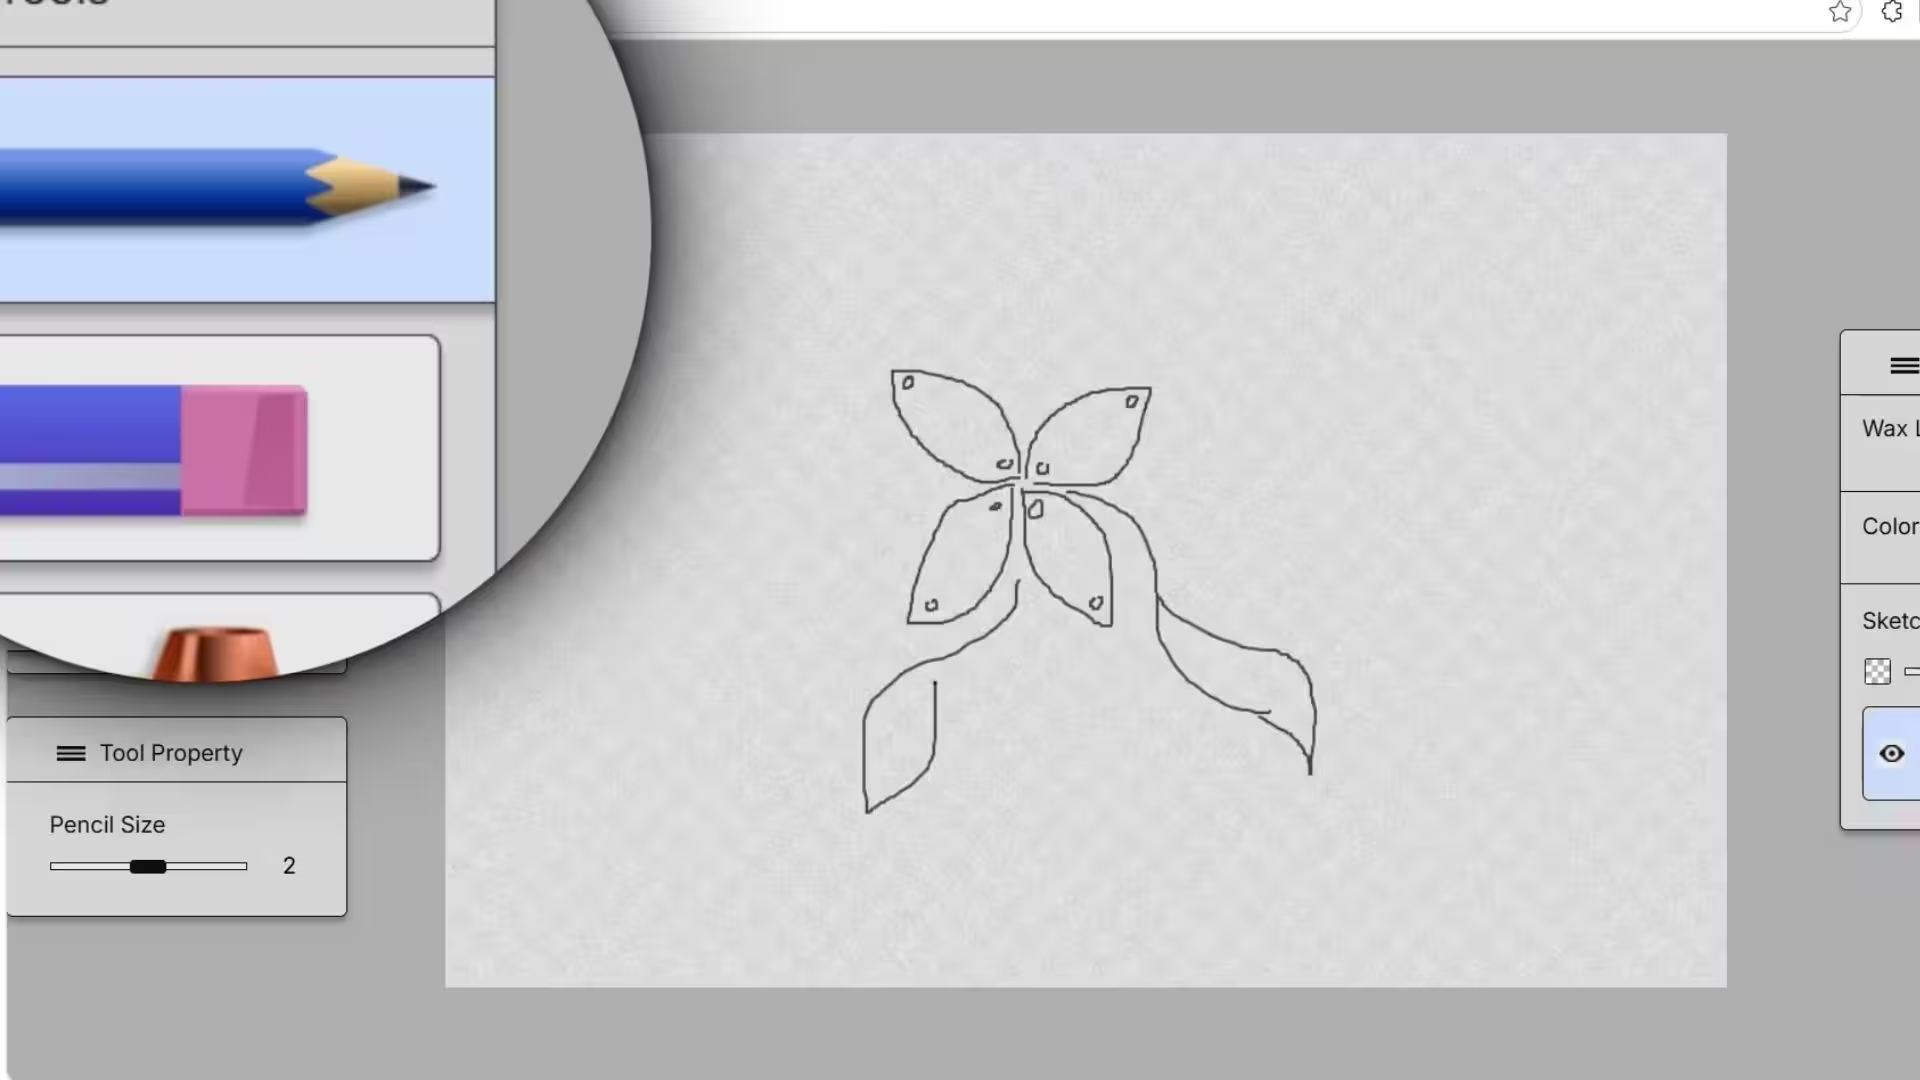
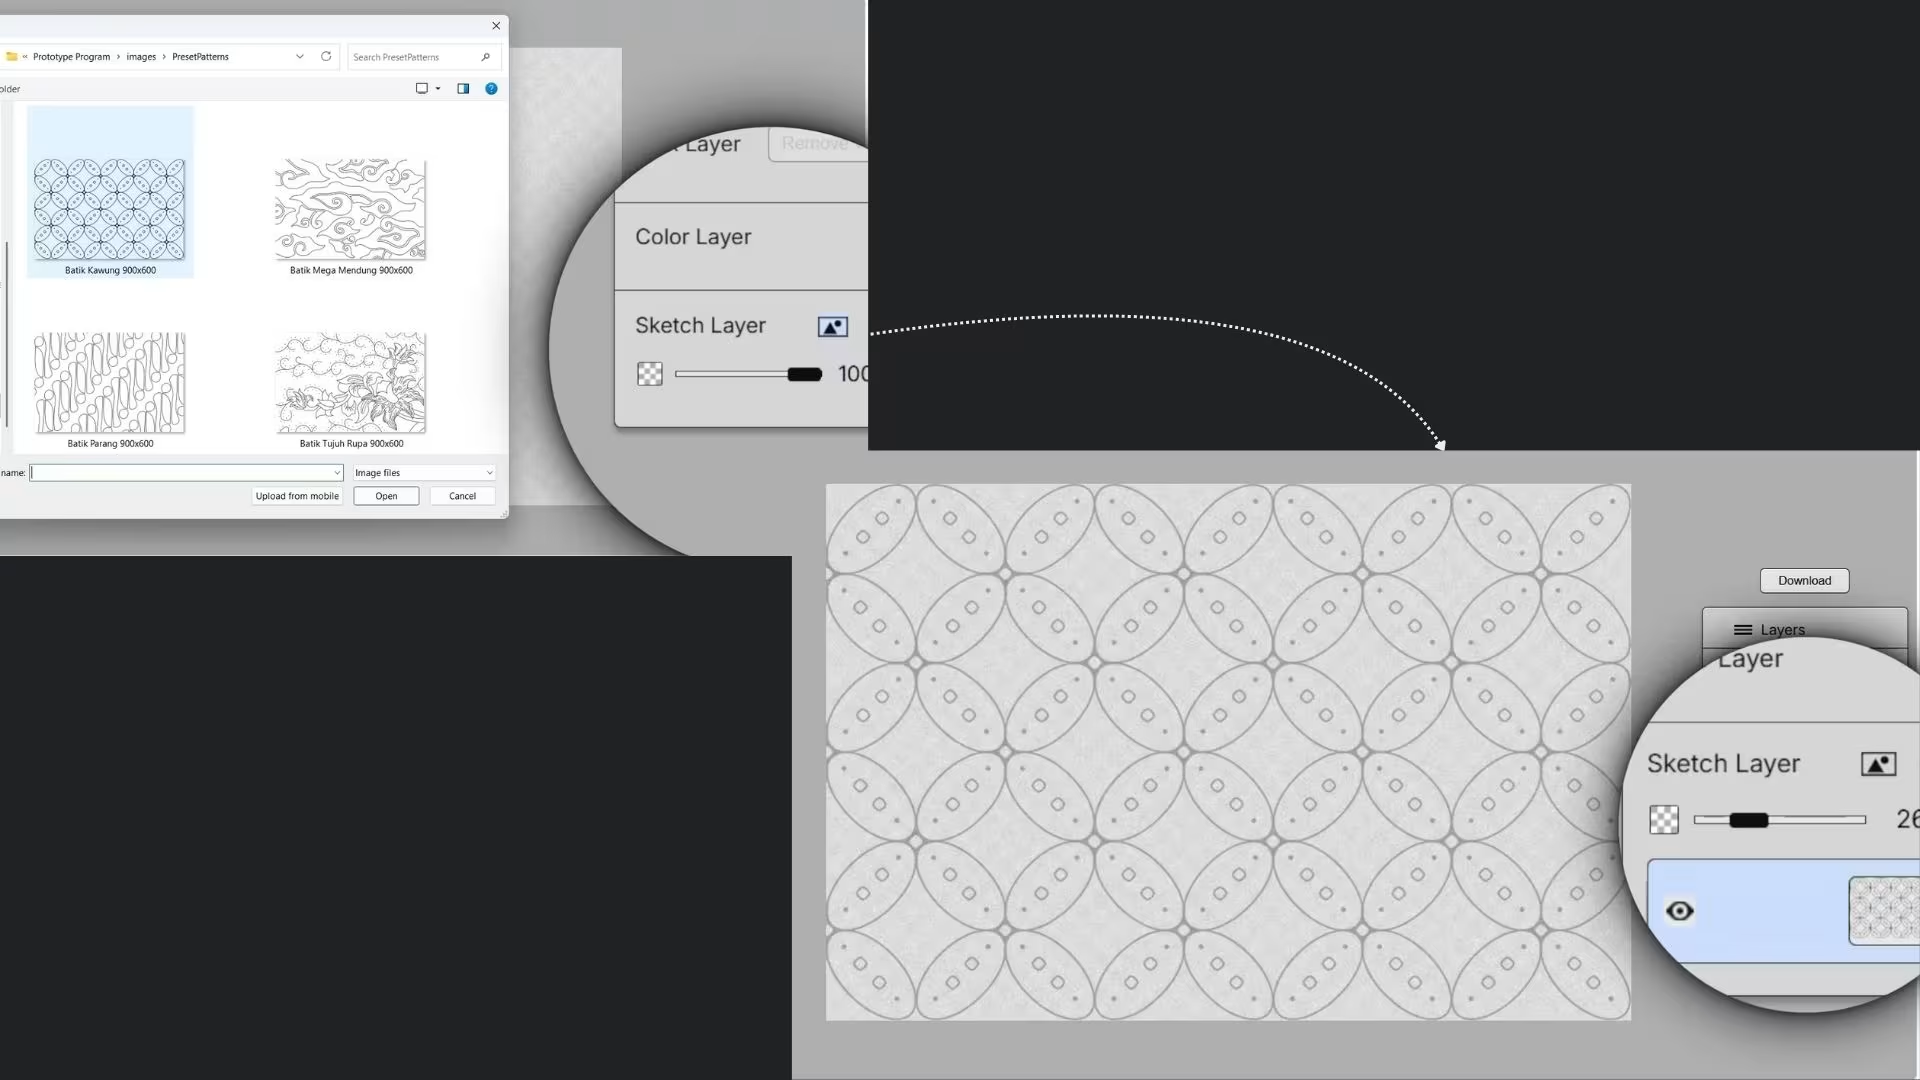
The user can choose to sketch with the pencil tool (and erase when need to), or...
...insert any image from their library. Afterwards, they can reduce the opacity of this sketch layer.

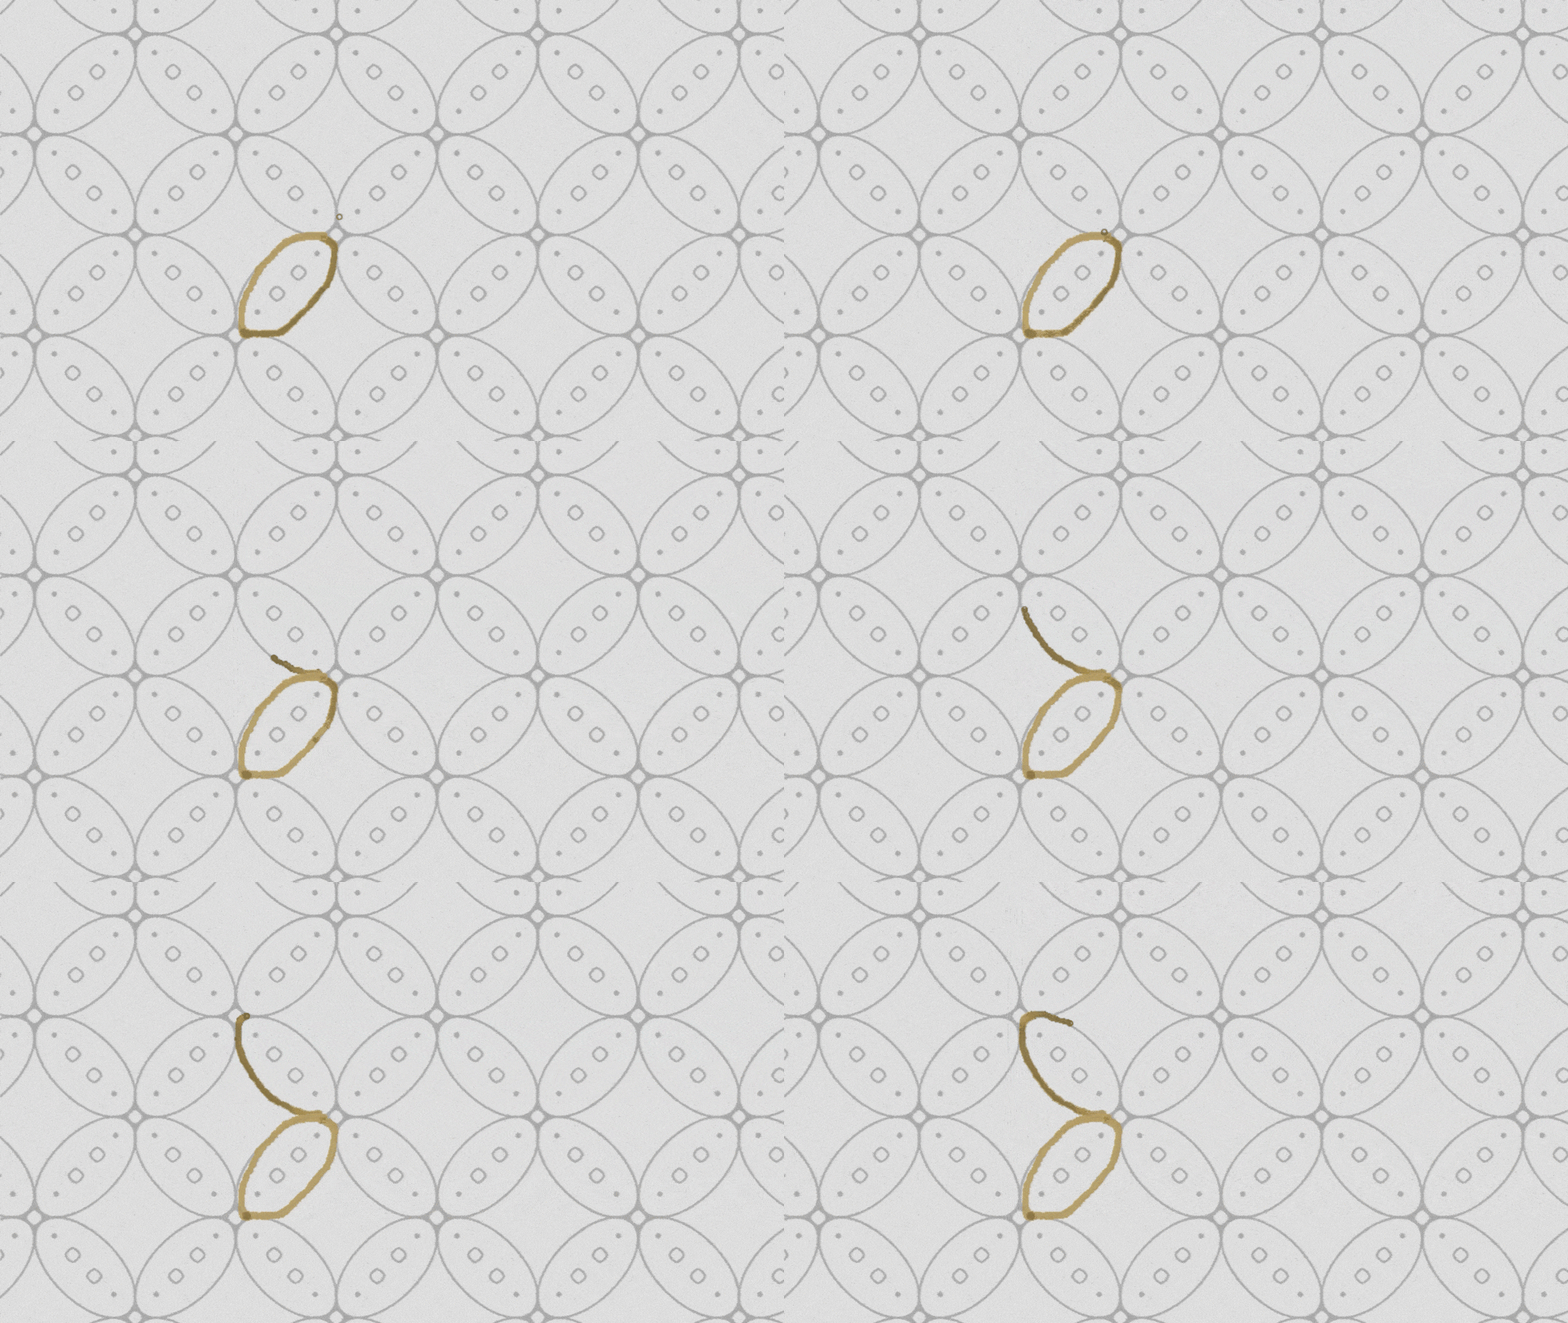
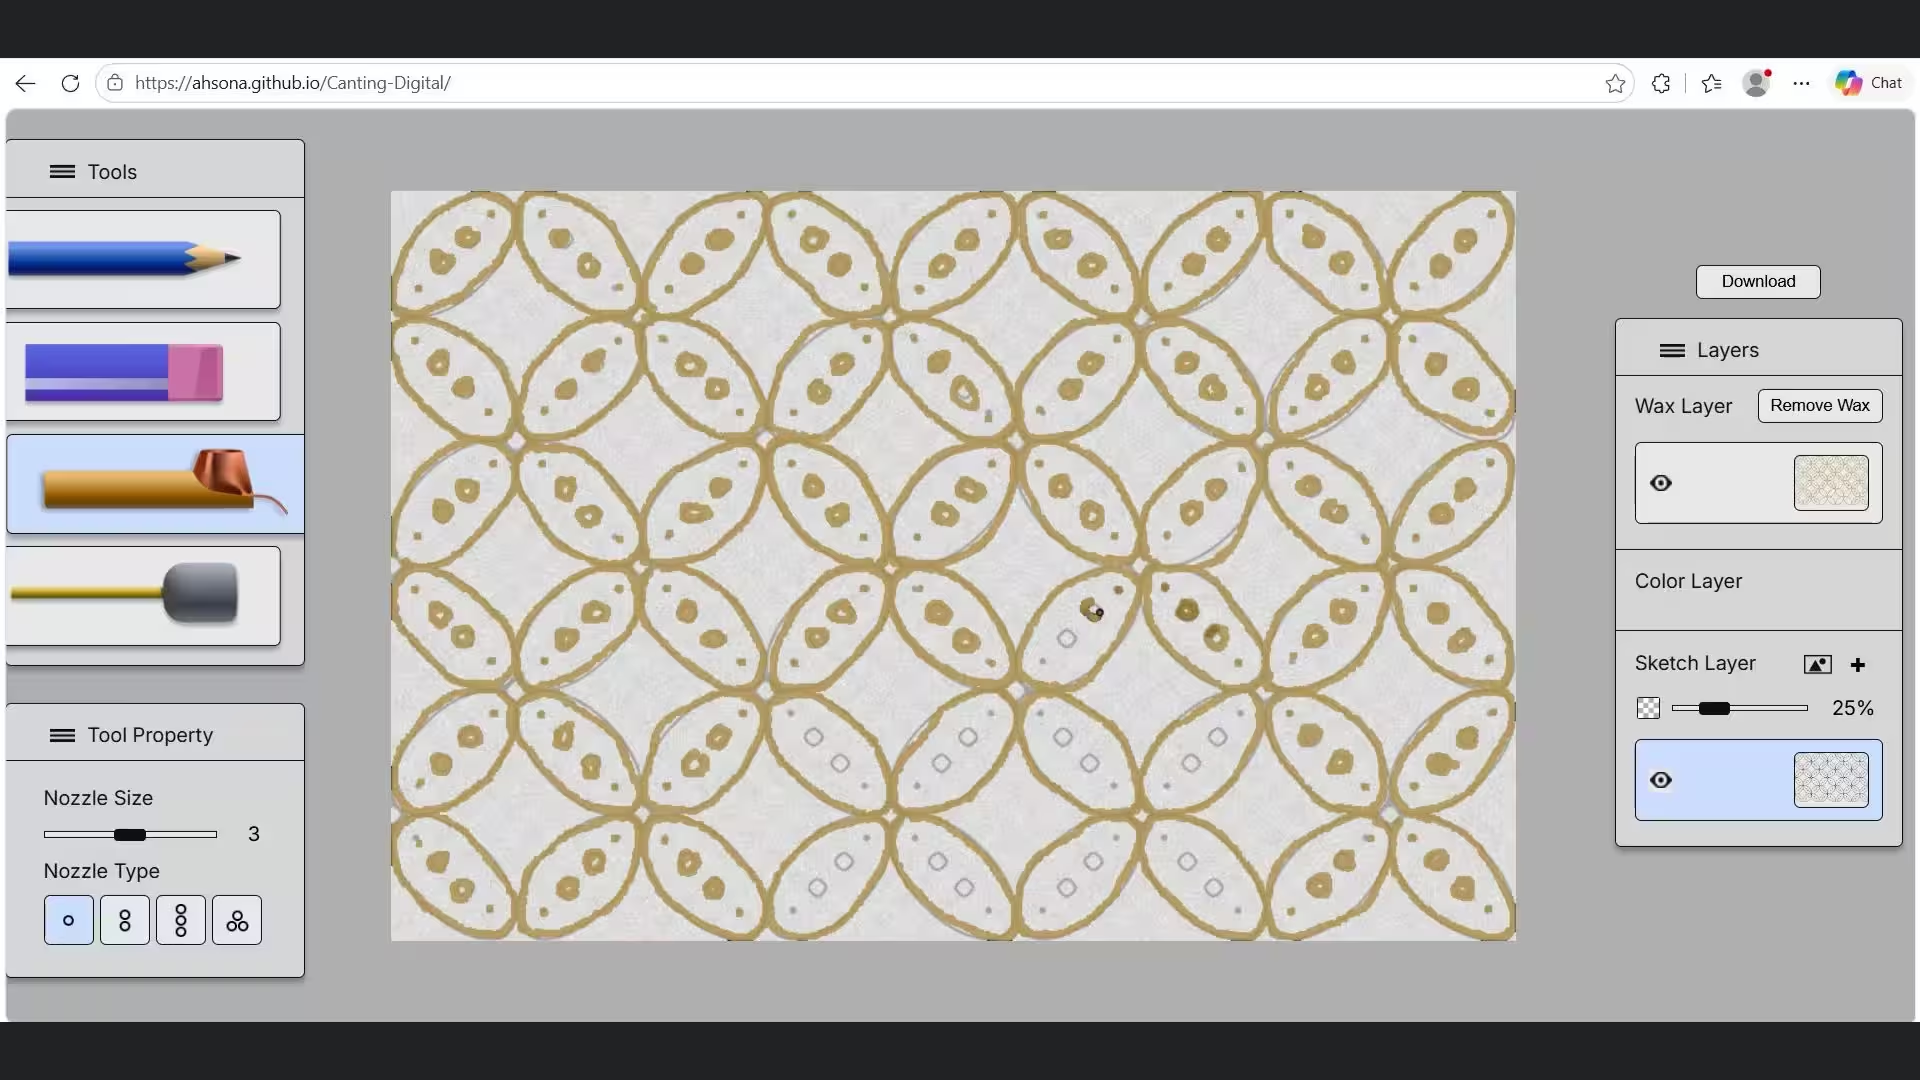
2. Trace with Wax

Using the canting tool, the whole sketch is traced carefully with wax. The user must be cautious not to make a mistake, as they cannot be rectified due to the lack of an undo button. There are options to adjust the nozzle size as well as changing its type.

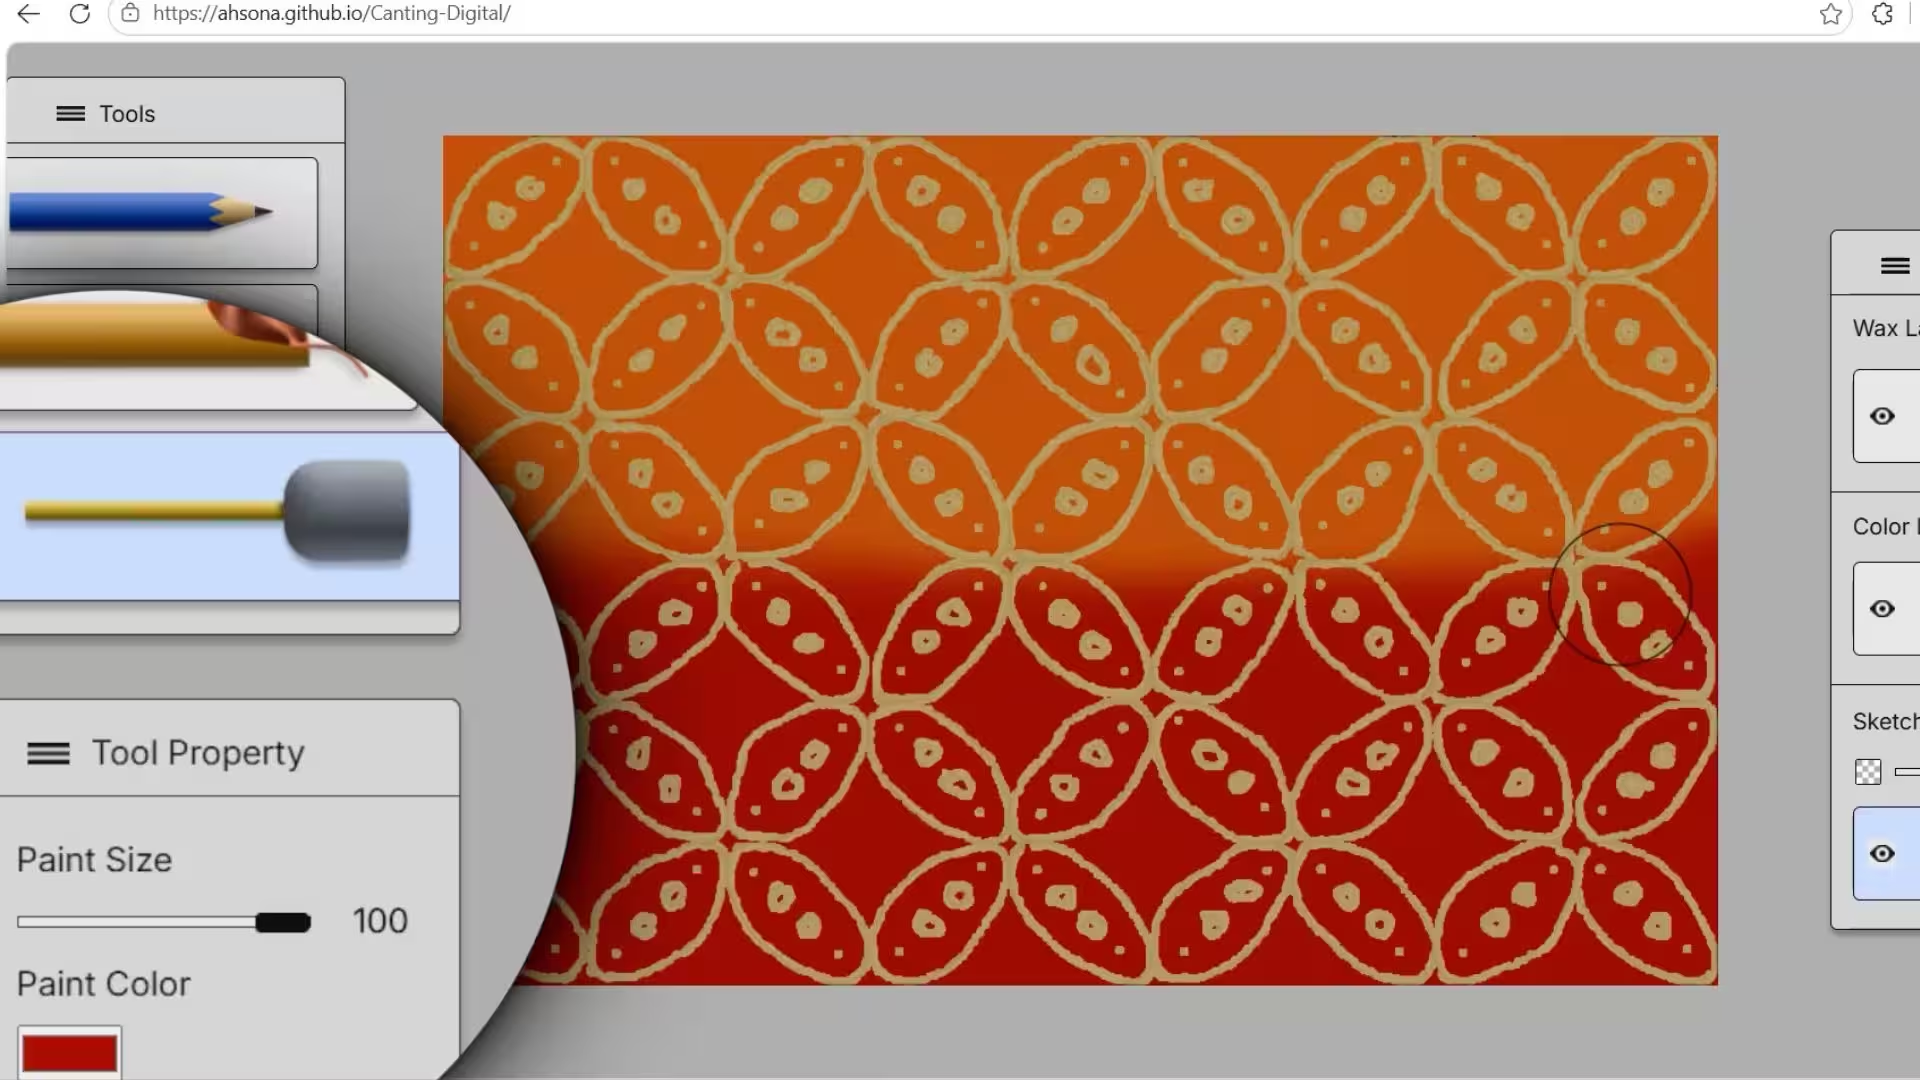
3. Color

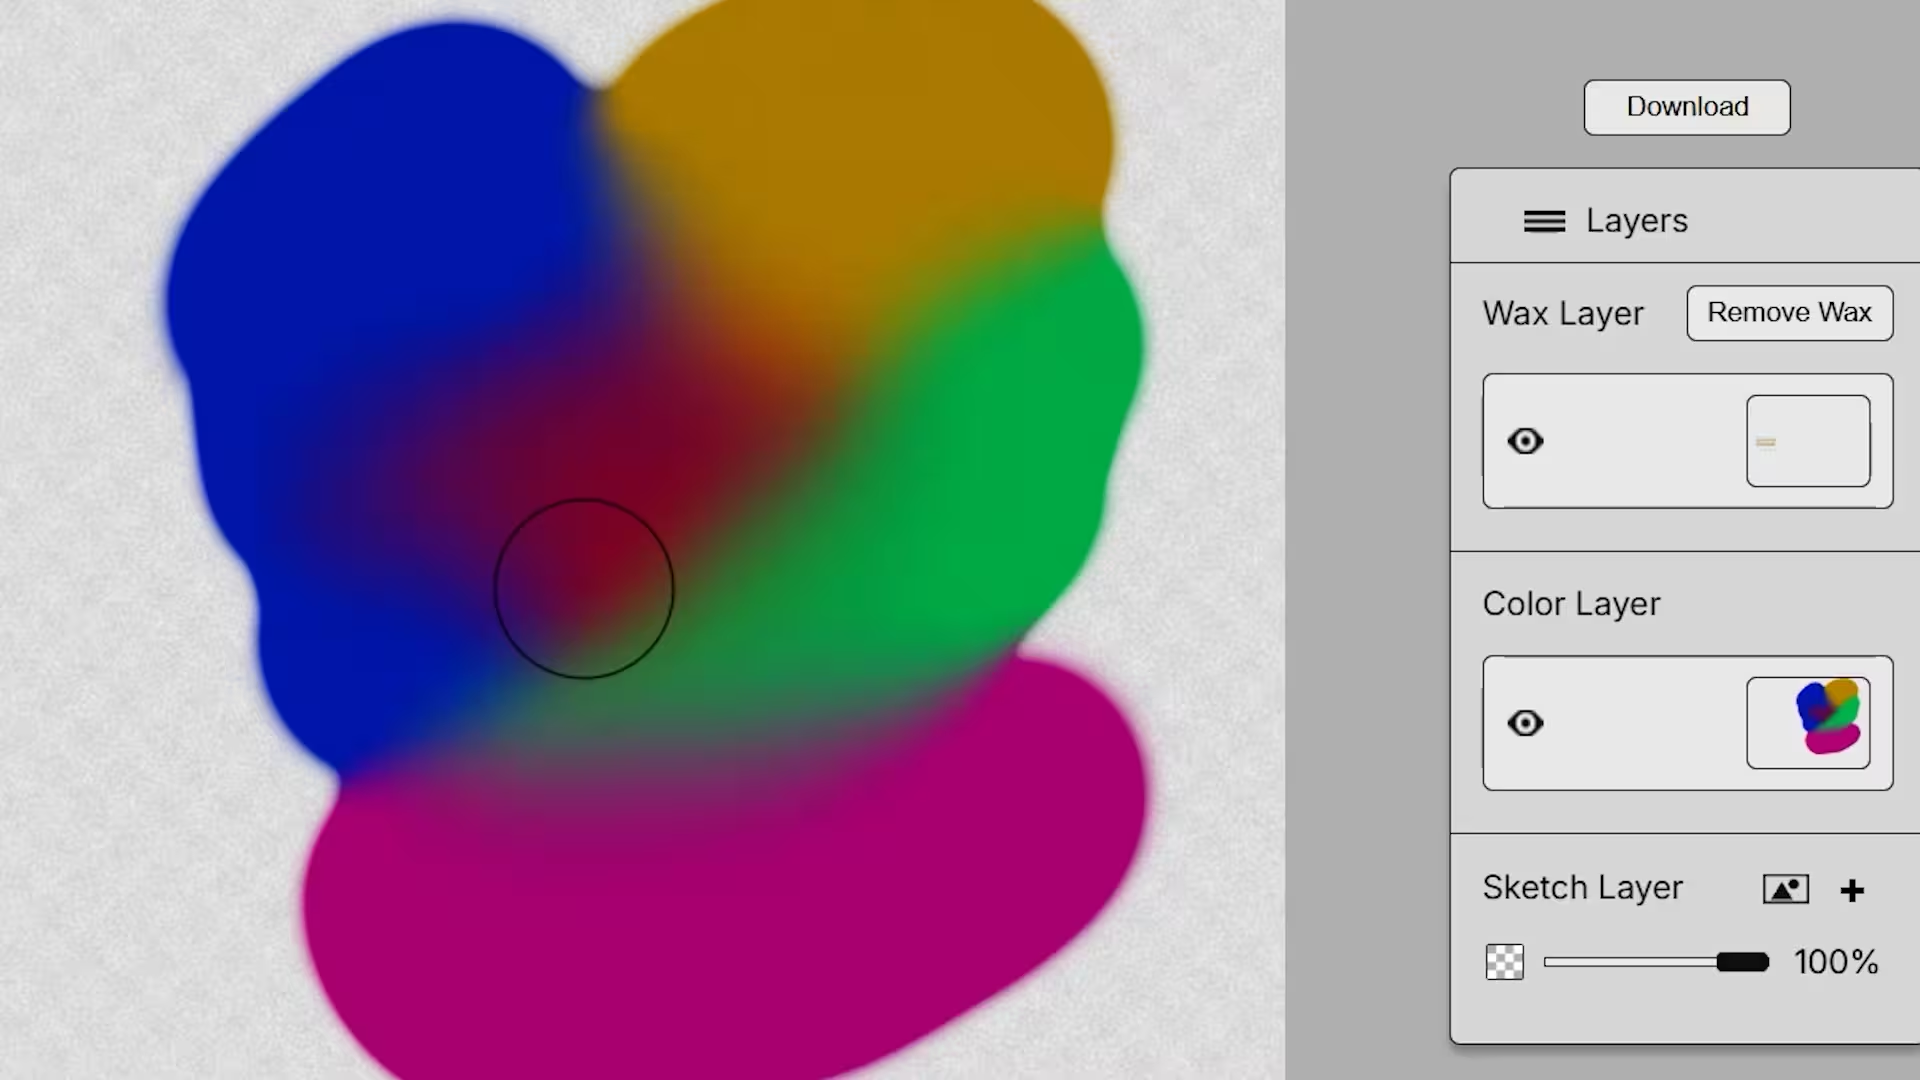
With the brush ("paint dabber") tool, the user can freely pick any color and cover the whole canvas with "dye." Colors can also be mixed and layered over each other.

4. Remove Wax

After the whole canvas is dyed, the user clicks the "Remove Wax" button on the right panel inside wax layers, and the canvas will be "boiled" to reveal a wax-resist effect. The user can then download their artwork, or continue by repeating the steps once more.

Making the Brush Interactions

The main engine for this application is p5.js, a JavaScript library dedicated to creative coding, and it has the capabilities to simulate the characteristics of wax and paint on cloth. Admittedly, I only have a foundational knowledge of p5.js, and so I vibe-coded the brush interactions with ChatGPT. As much as I preferred coding it all by myself or having a programmer to help, due to time constraints and the lack of people proficient (or even know at all) in p5.js, this is where I decided that AI could help me make the parts that I am not a pro at.
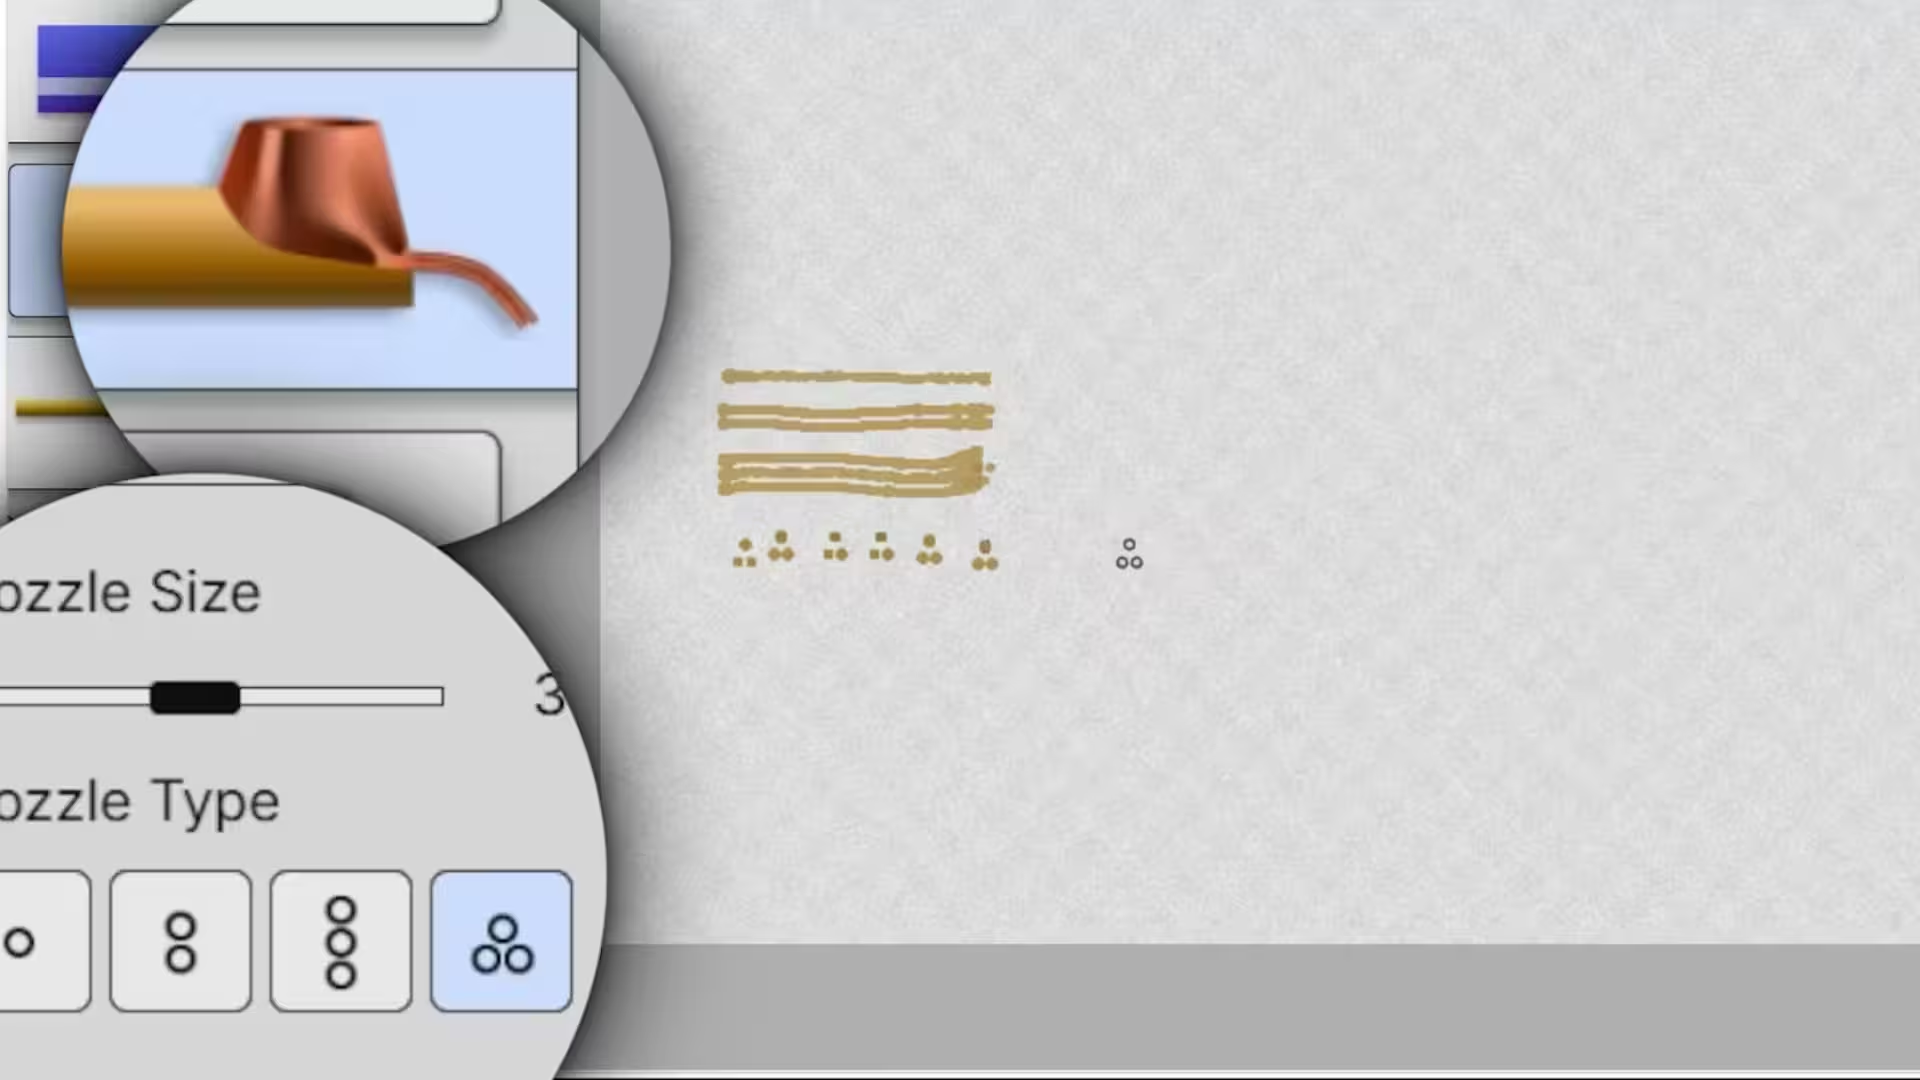
I first looked at how the community of p5.js makes watercolor or paint brushes. I found the one that resembles the closest to wax, and I attempted to recreate it myself. I then had AI give me pointers to modify the brushes' properties to simulate wetness, opacity, and spread. It was not perfect, though, as there were initially many bugs and issues with what AI gave me. However, thanks to what I studied beforehand about p5.js, I was able to fix its code and continue.

AI was helpful in introducing me new functions or features that I did not know of before, which was useful in teaching me how to make color-mixing or animating through code. It also helped point me in the right direction on bugfixing, realigning, and readjusting the margins and placements of my HTML and CSS elements. Although it was not completely smooth, it is through this iterative, back-and-forth process with AI that I was also able to learn more deeply about design conventions and about making an application such as this. 

User Trials through Exhibition

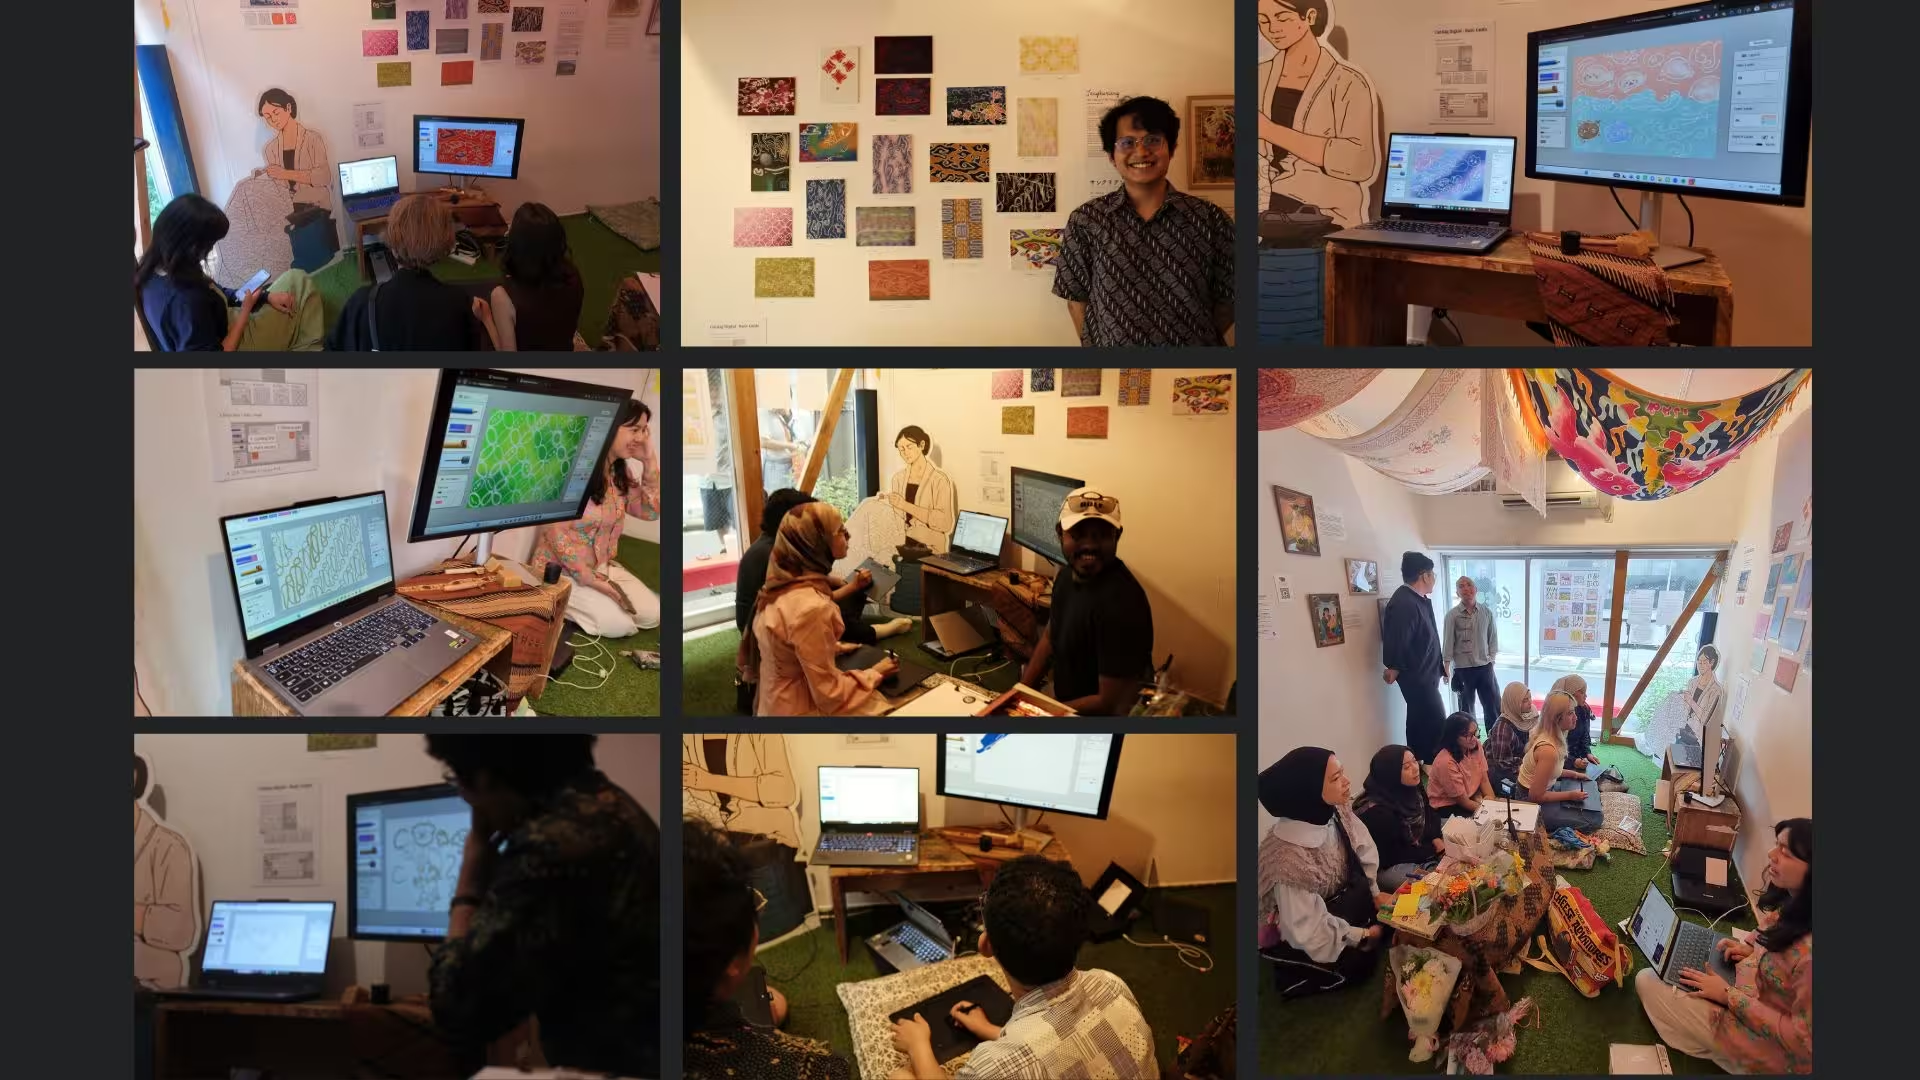
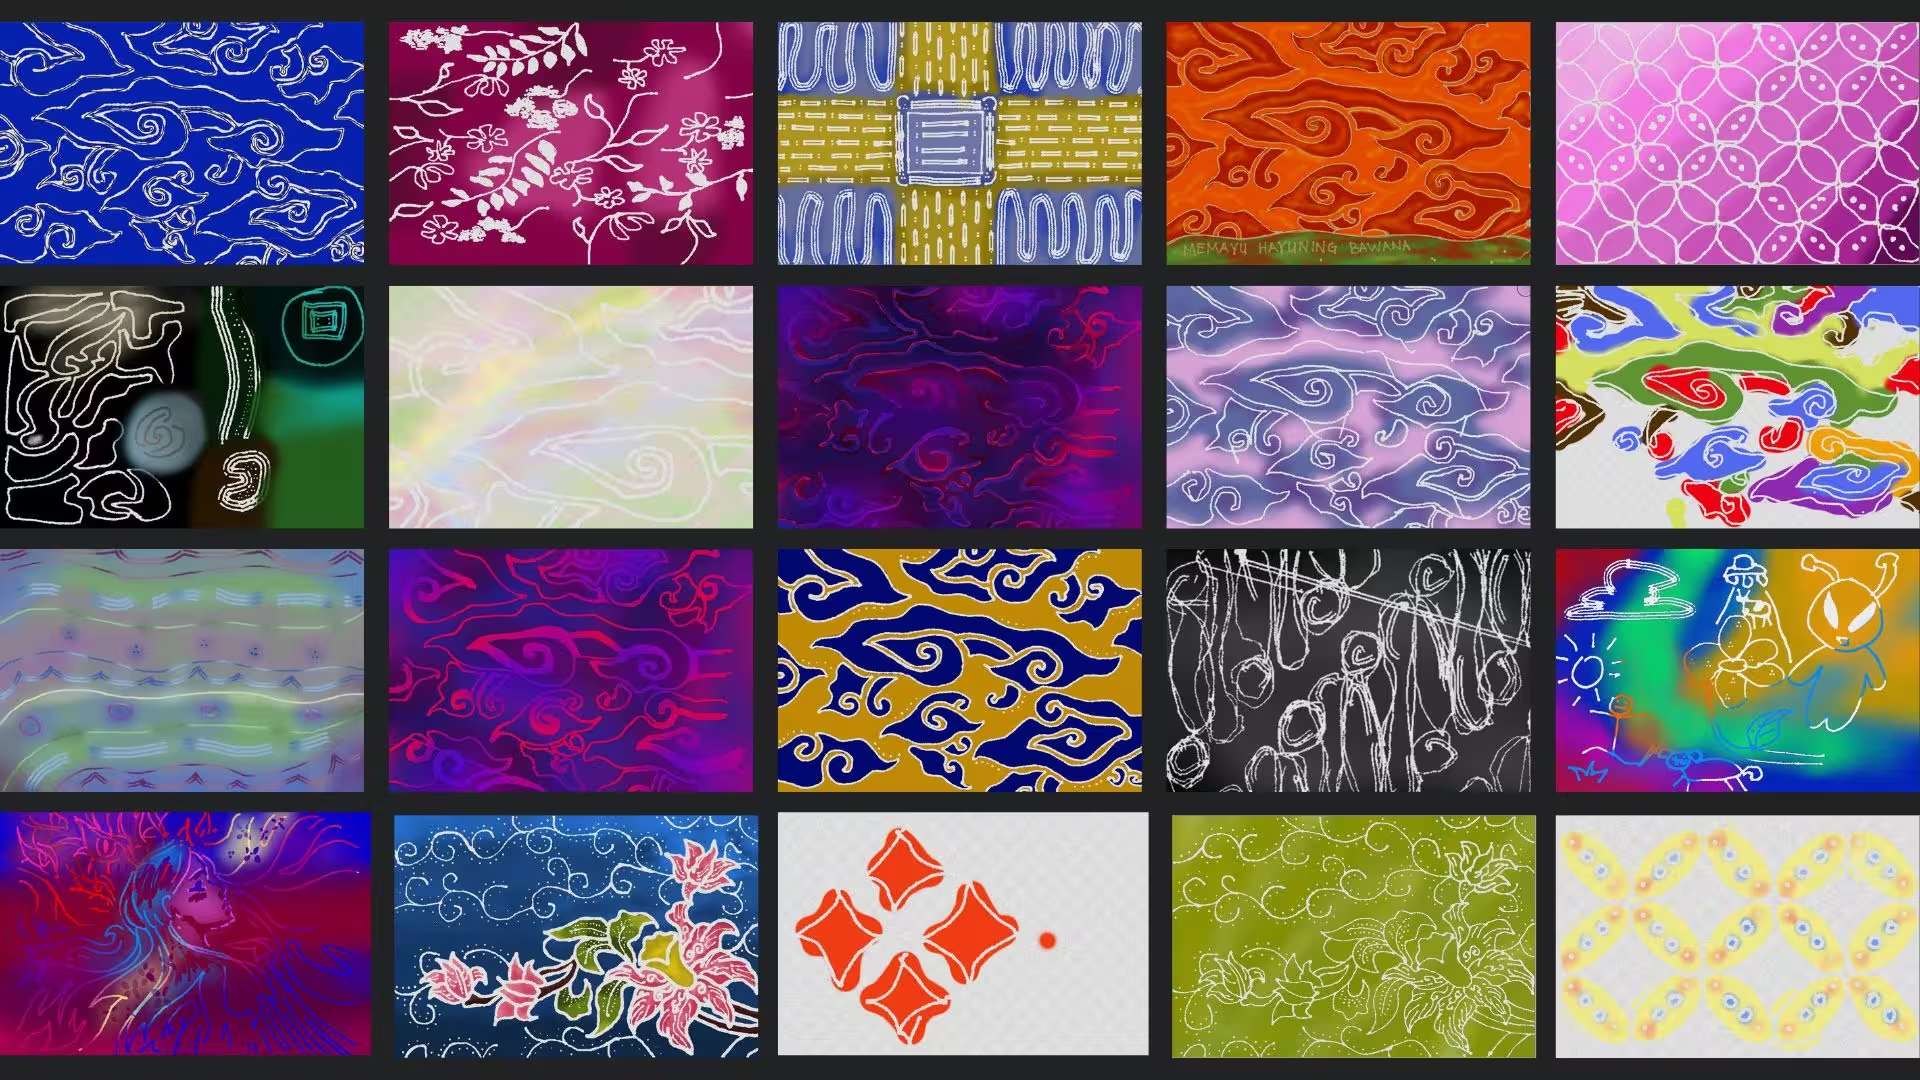
Together with a fellow student, we conducted an interactive exhibition at KocoGarden Project, Yokohama, Japan from 27th to 30th August. Visitors can use the program with Wacom pen tablets, draw their batik artworks, and have them printed as postcards. Before this though, we also conducted a pre-exhibition trial with 20 works created from 15 users from different nationalities with varying familiarity towards digital drawing and batik-making to make an initial evaluation of the program. Their works were displayed in the exhibition to serve as example works produced from the program. 5 participants were invited to a semi-structured interview with informed consent, and their answers led to some changes to the interview questions for the next set of participants.

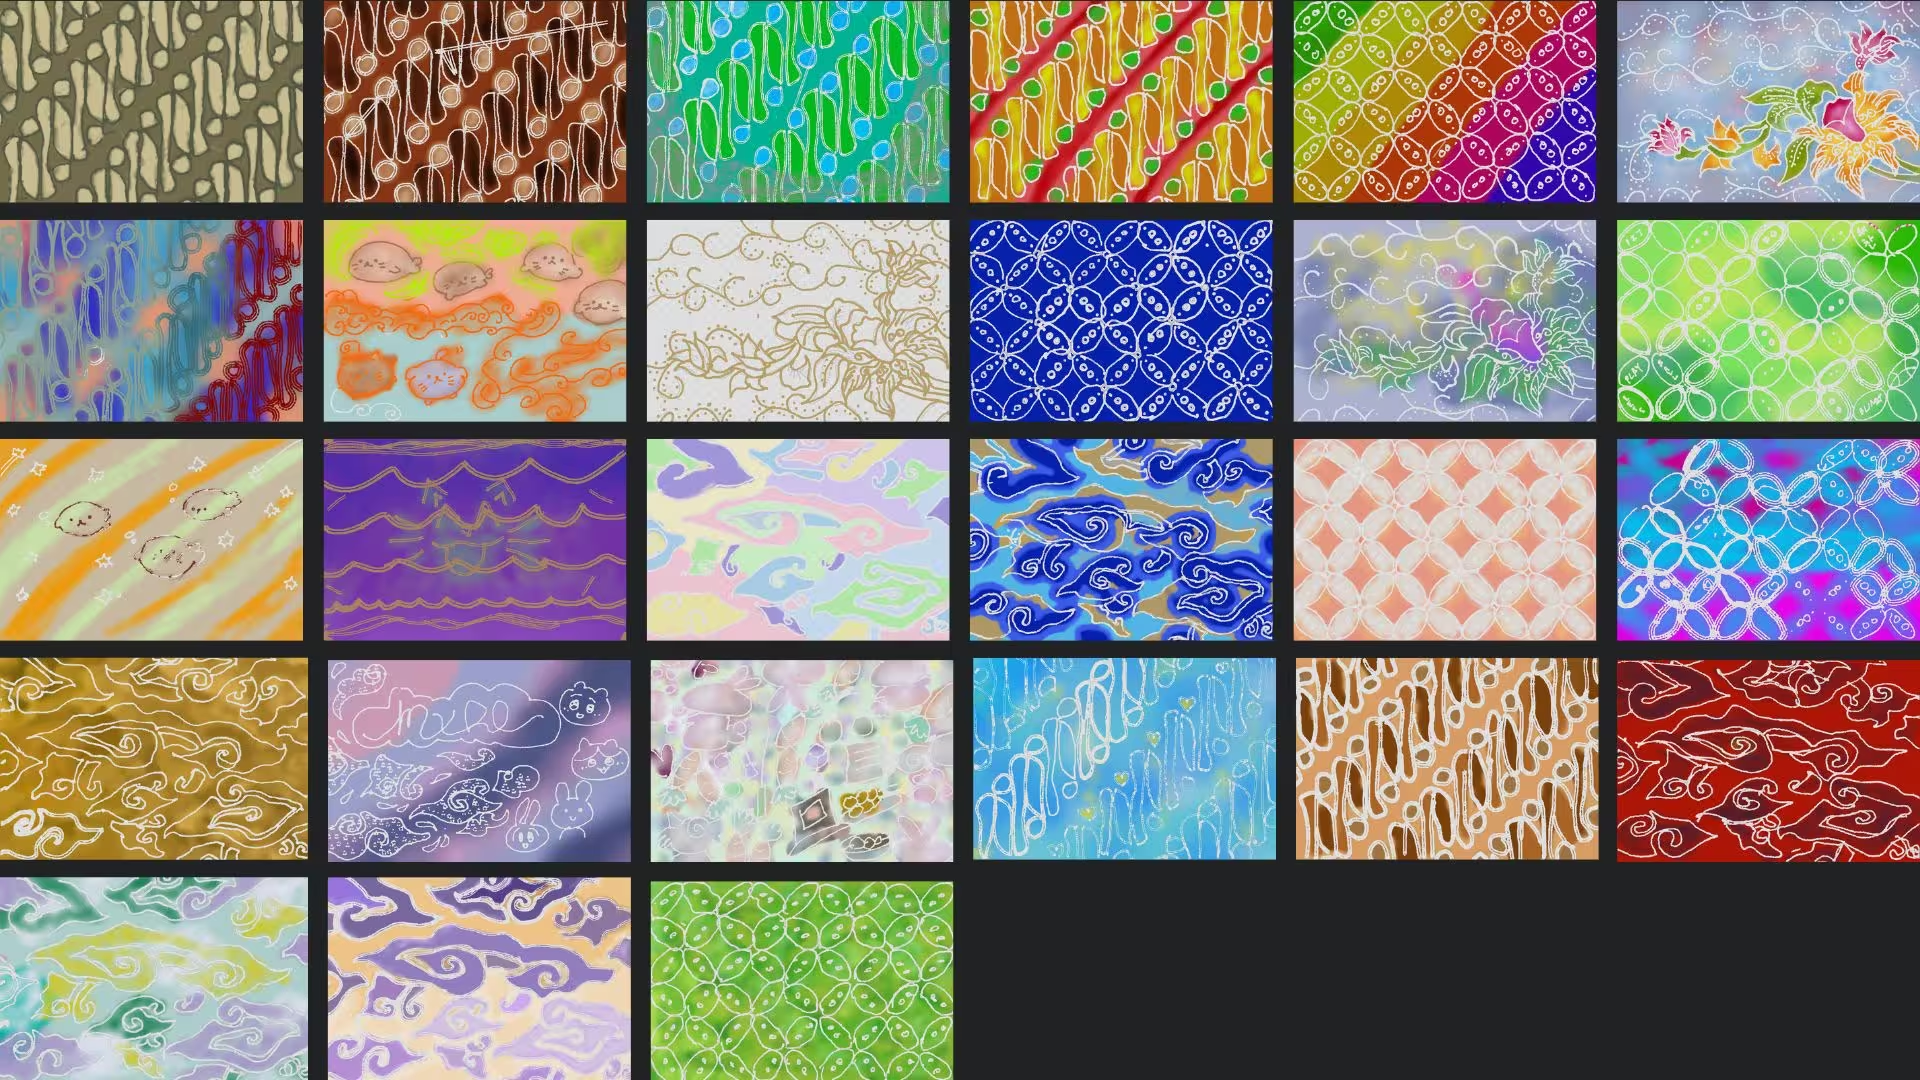
30 visitors had tried the program and resulting in 27 artworks. Similarly, these visitors also have different experiences with digital drawing and batik-making, but this time most of these visitors were Indonesian.

Outcome

The exhibition was a success, and I was personally surprised and glad to see that my program was popular among visitors! Users sat down and draw, casually chatting, while making art. I was also able to form new connections with fellow academics and designers in the industry!

User-Generated Content

Here are the 20 created artworks from 15 users during the pre-exhibition trial:
Next, are the 27 artworks from 30 users made during the interactive exhibition (note that some users collaborated together to make a single artwork):

Interview Results

Some visitors’ drawings were recorded into a timelapse and observations of their experience were noted. 2 days after the exhibition wrapped up, 10 participants were invited to an interview through convenience sampling. These data were collected to investigate how users interact with the system and gather feedback.

Interview results reveal that almost all users find the experience therapeutic and relaxing, and that the program is helpful at educating beginners about batik-making. Many find the brush interactions to be accurate to real wax behavior, and feels positive affection due to a sense of cultural reconnection.

On the other hand, some users find the lack of undo/redo button to be stressful, and especially frustrating when a random brush stroke due to a glitch is created and cannot be undone. Perhaps I should reconsider implementing the undo/redo button afterall. Moreover, a brief tutorial/tooltip integrated within the program would help inform beginners better and learn at their own pace.

Next Steps

Following user feedback, I intend to continue improving and iterating the application over the course of my master's program. One important addition would be an onboarding process for users to learn how to use the program independently. Optimizations and bug-fixes for the tablet version are also warranted.

(Link to the current prototype: Canting Digital Prototype)